

In this article, I will show you the step-by-step guide on how to get a free SSL for HostGator.
If you are interested in getting a SSL certificate for your website but is currently under a budget. Then worry no more as you can actually get one for free.
Let’s Encrypt offers free SSL certificate for everyone but the only catch is you would need to renew it every 3 months.
Personally, I do not mind it at all considering how expensive some SSL certificates are.
Furthermore, if you are in HostGator, then you are pretty lucky as HostGator allows you to install the Let’s Encrypt pretty easily.
The thing is, there are some hosting that uses a different control panel that basically doesn’t allow you to add your own SSL certificates.
I am very glad to tell you that HostGator is not one of these hosting.
Here are your step-by-step guide on how to get a free SSL for HostGator.
1. Go To ZeroSSL.com
The very first step is to go to ZeroSSL.com
Click on the Online Tools button.
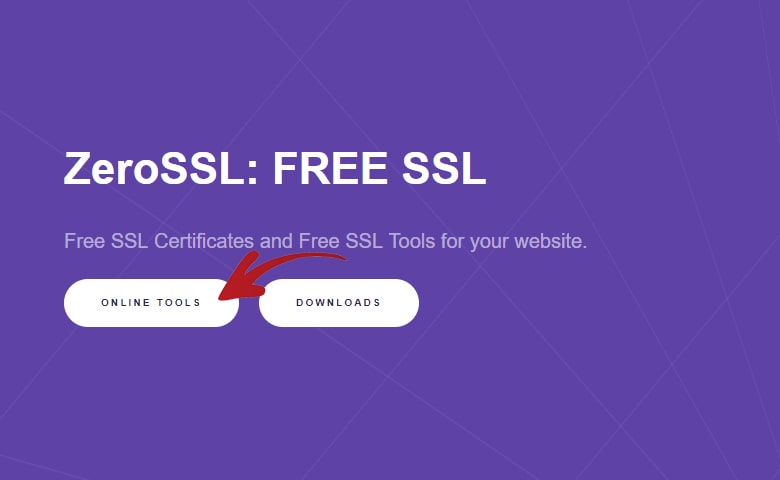
It will then automatically scroll you down to this section.
Click the Start button.
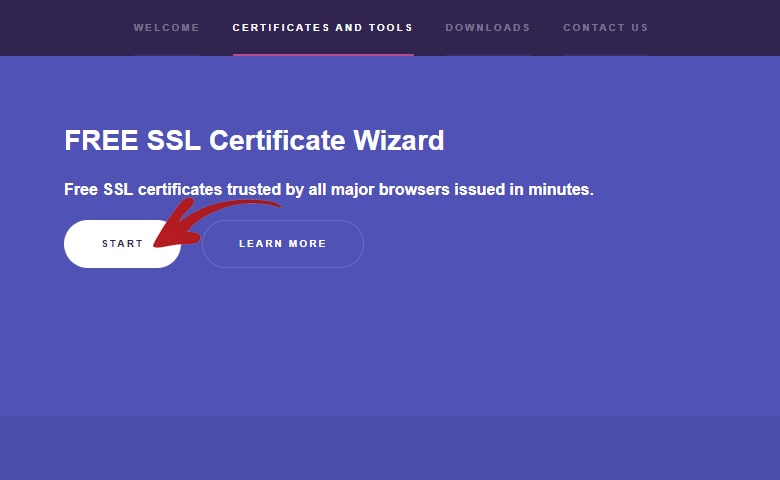
The page will then refresh and bring you to this page.
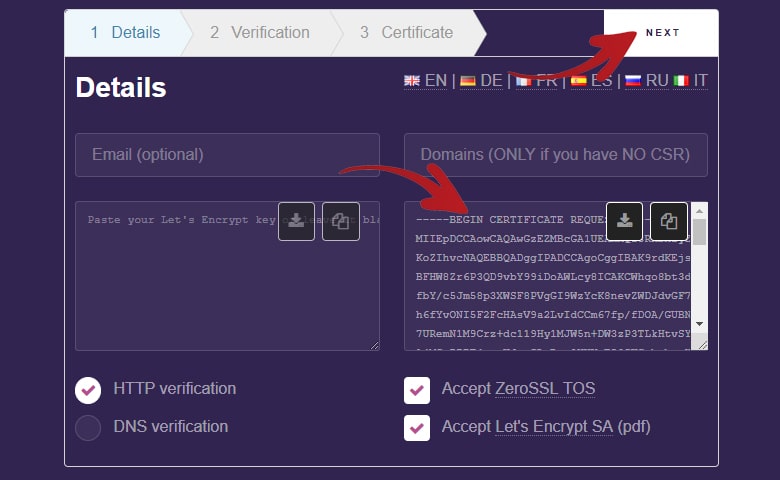
2. Website Details
Type you domain name on the input field on the right side.
You will need to type both the non-www version and www version of your domain. Separated by a comma.
In my case I type gtgmyreviews.com, www.gtgmyreviews.com
Also check the HTTP Verification, Accept ZeroSSL TOS and Accept Let’s Encrypt SA checkboxes.
After this you can now click the Next button on the top right corner.

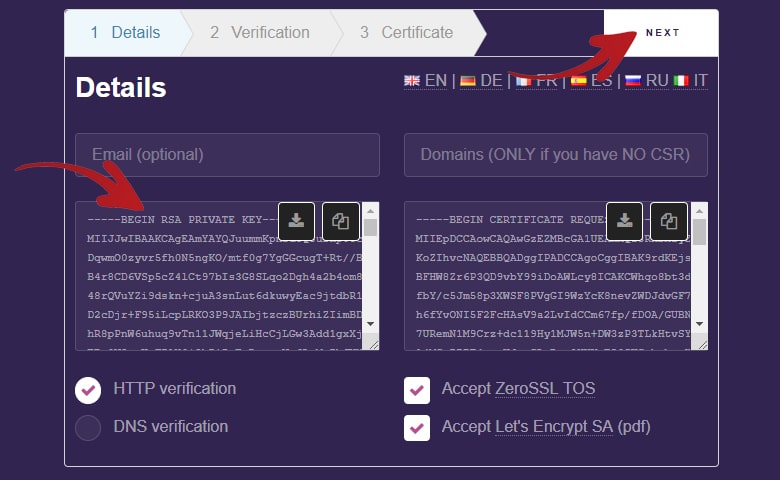
It will then show you a popup saying Generating CSR. Just wait for it to finish generating.
As soon as it is finished generating you will then see a popup messages on the lower right side confirming this.
Also the right textarea box will now be filled with text.
Click the Next button again.
It will show a popup again saying Generating Account Key. Just wait for it to finish generating again.
As soon as it is done, it will show a popup message on the lower right side again confirming this.
And also, the left textarea box will now be filled with text as well.
You can now click the Next button again.
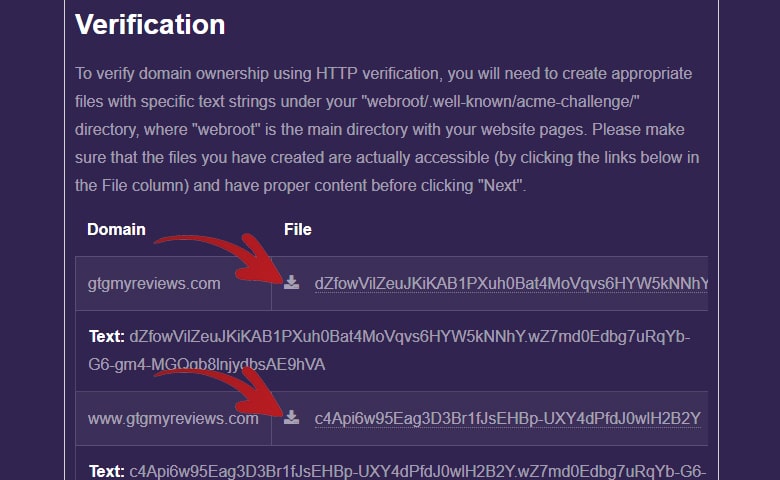
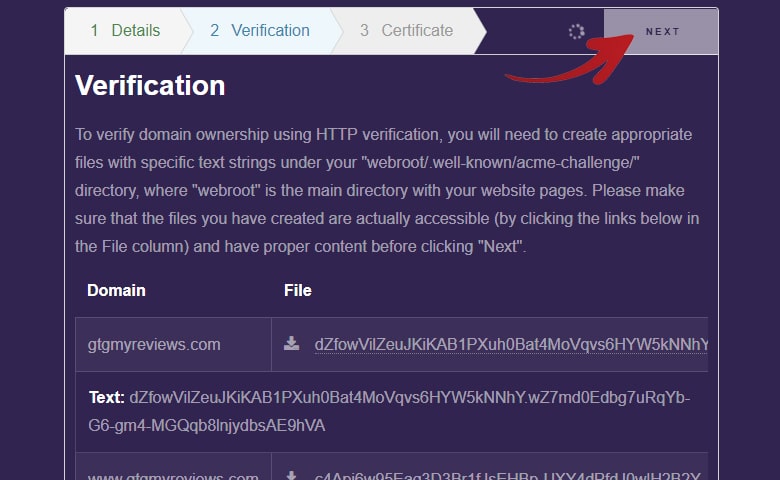
3. Verifying Website Ownership
We will then be redirected to the Verification step.
Basically, we will need to upload two files in our cPanel before we can proceed to the next step.
If you have verified your website with Google before then the process is very similar. The only difference is we will need to upload the files in a different folder.
First is let’s download the two files by clicking on the download icons as shown below.
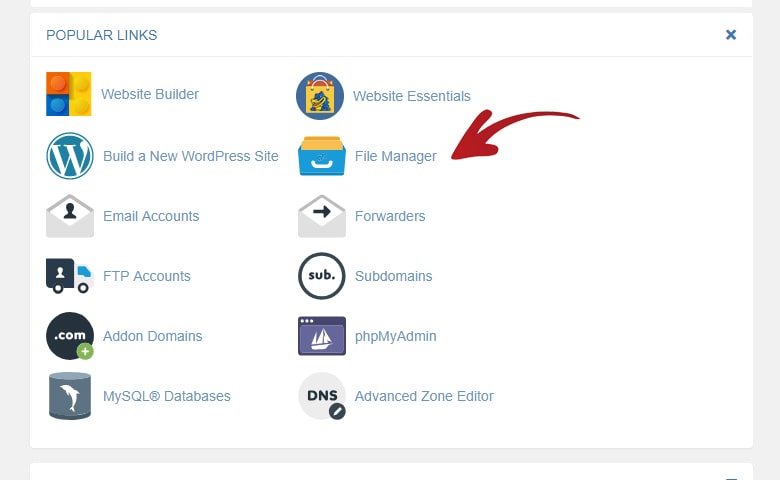
You can now log-in to you HostGator cPanel.

Once you are inside your cPanel, find and click the File Manager icon.
Inside the File Manager, open the public_html folder.
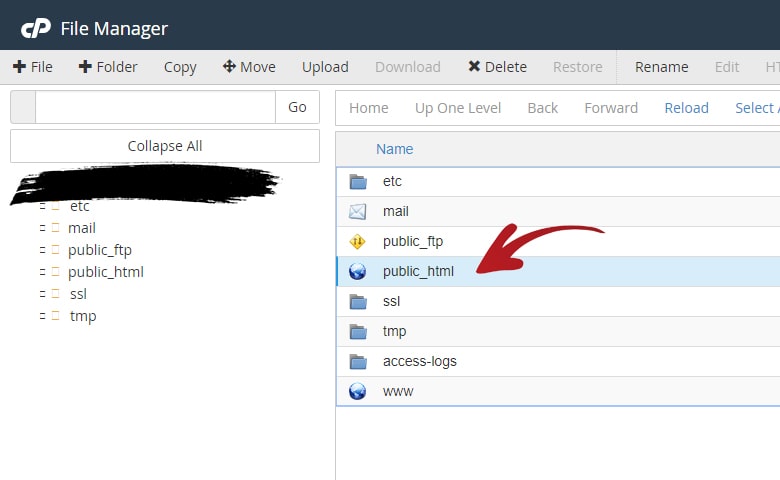
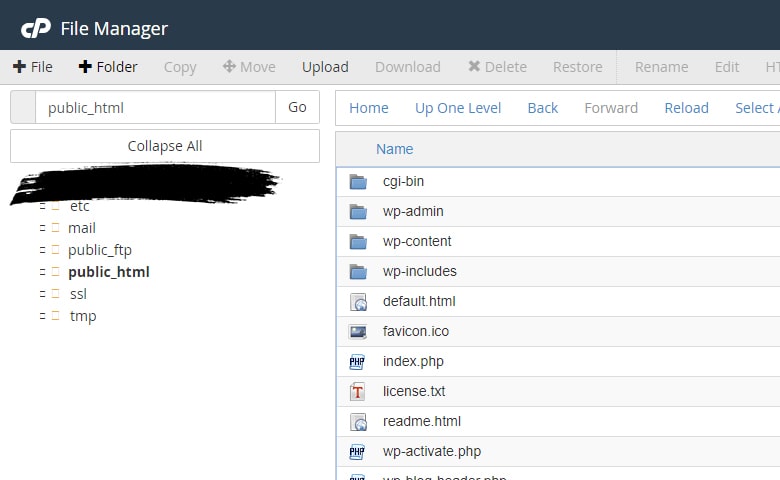
Once you are inside the public_html folder, it should appear like this if you have WordPress installed.
By default, the HostGator File Manager already has the folders we need to add but they are hidden.
So we need to go to the folder settings to show the hidden files.
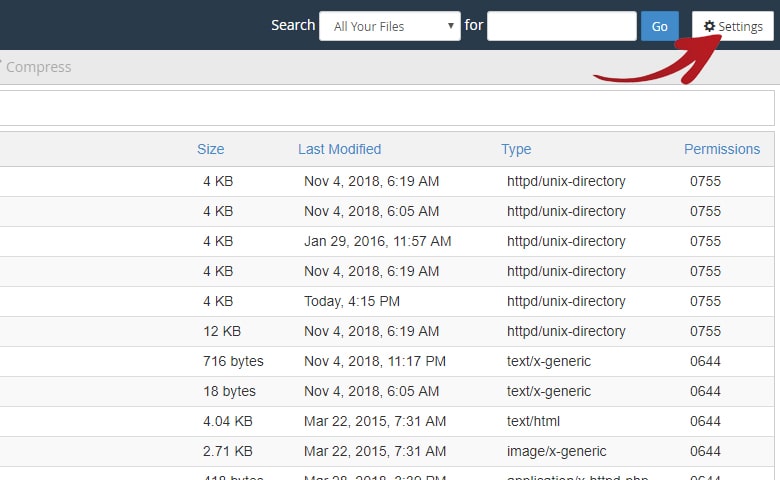
To do this look at the top right side of the File Manager.
Click on the Settings button.
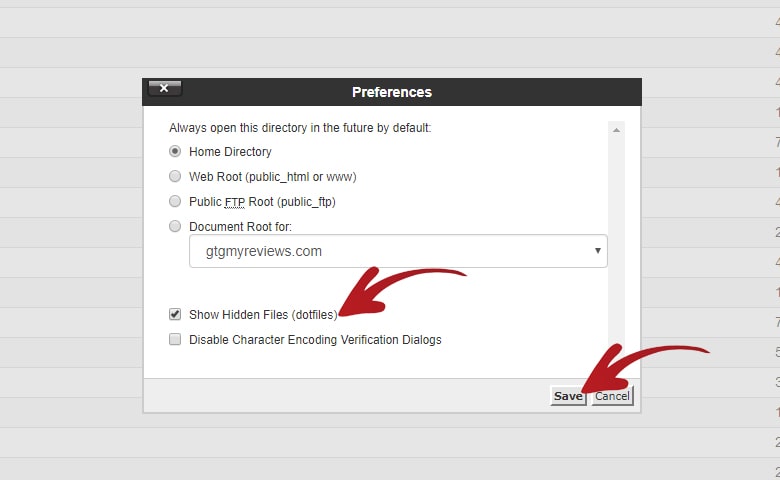
It will then show you this popup.
Check the Show Hidden Files checkbox.
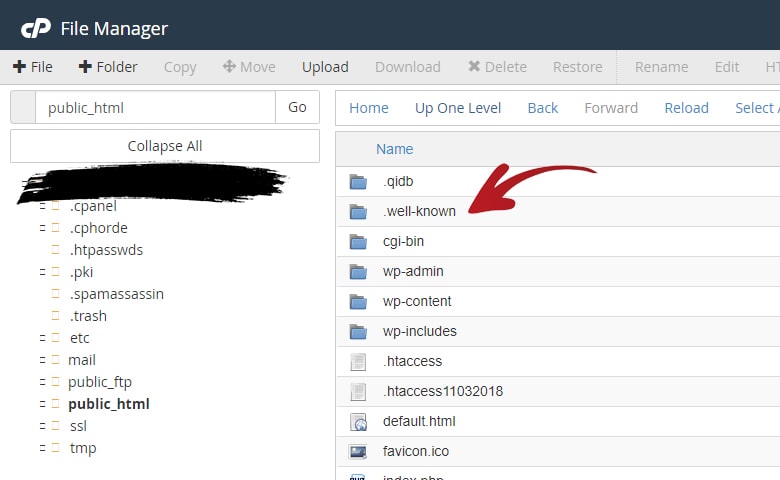
The page will then refresh and after that you should now see a .well-known folder appear.
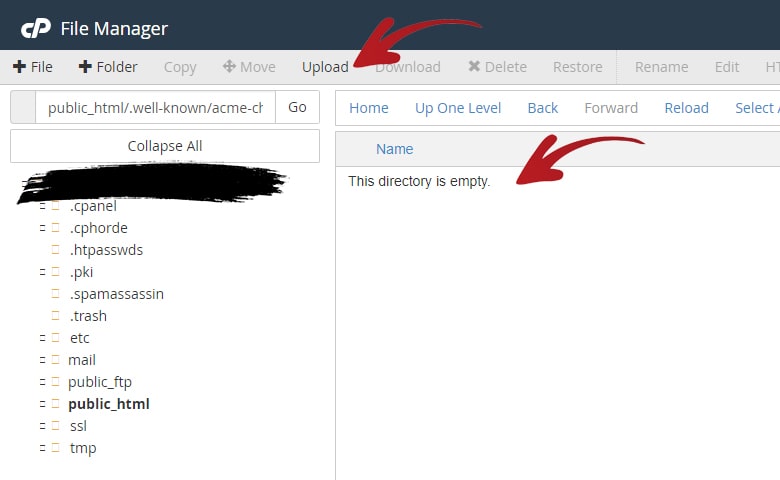
Open the .well-known folder.
Once inside, open the acme-challenge folder.
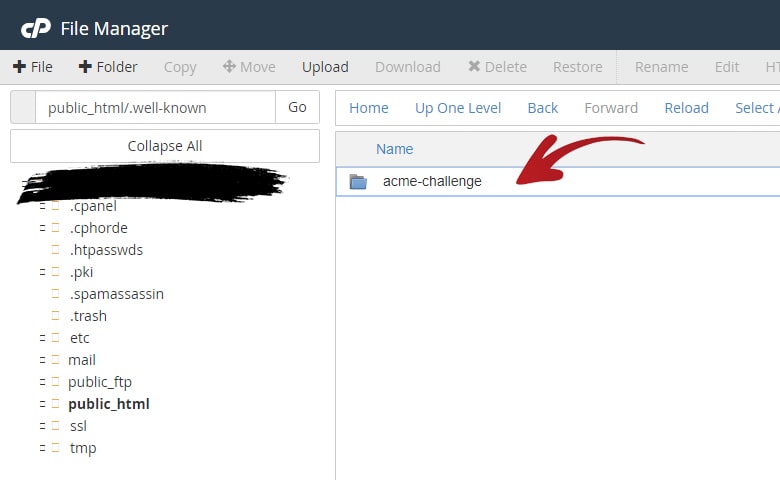
You will then see that the acme-challenge folder is currently empty.
4. Uploading Verification Files
This is where we will upload the two files that we downloaded earlier.
Click on the Upload button.
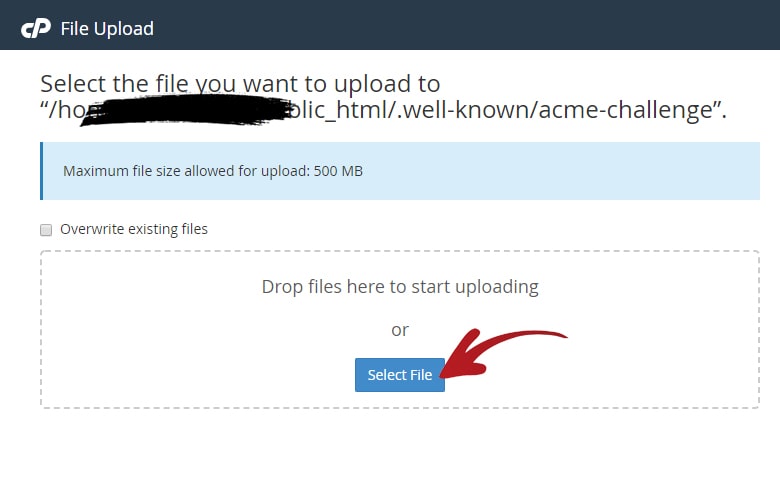
It will then bring you to this page. Click the Select File button and look for the two files that we downloaded earlier.
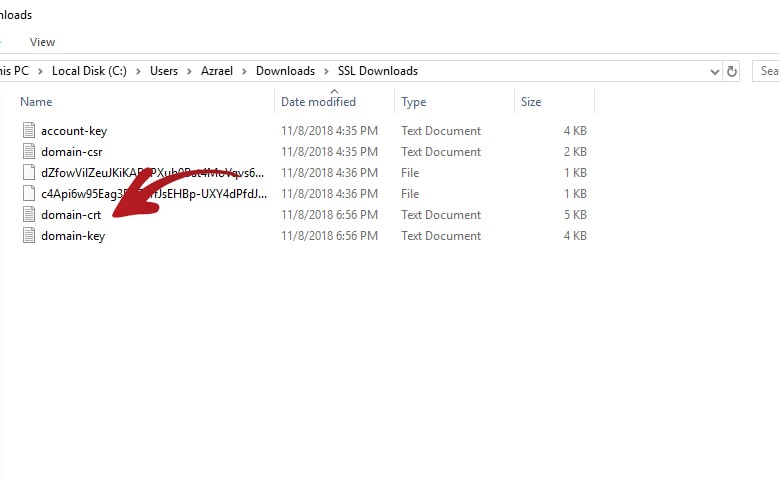
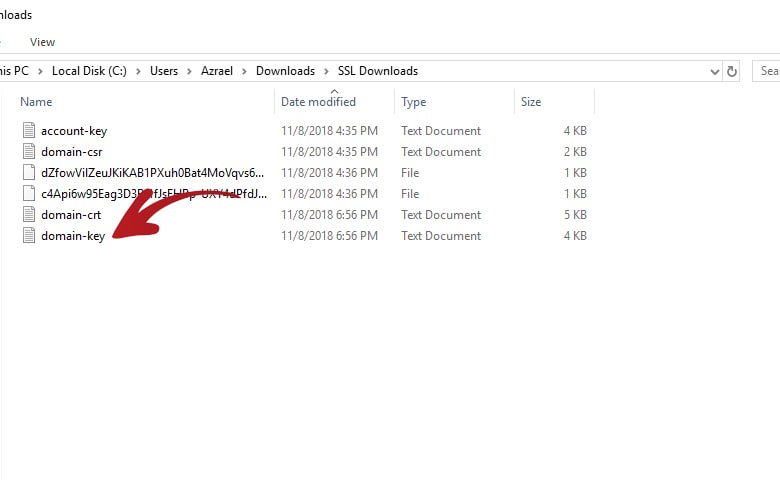
In my case, I downloaded them in a specific folder and it appears like this.
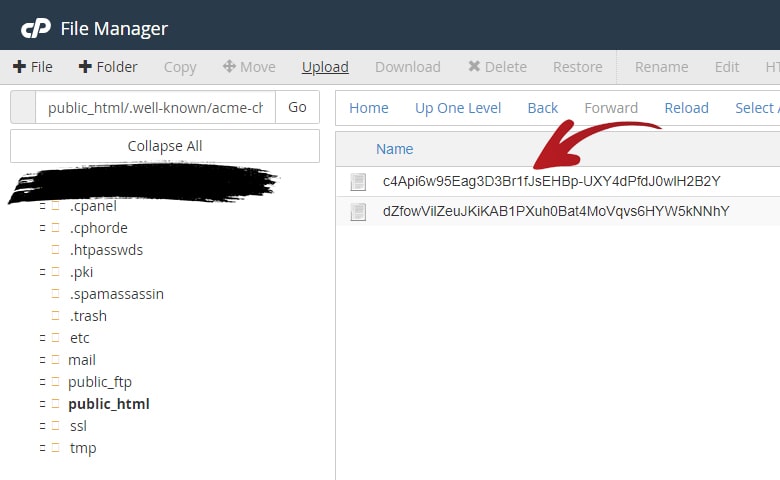
The files we need to upload are the files named similar to ones being pointed at in the image below.
Select the file and click the Open button.
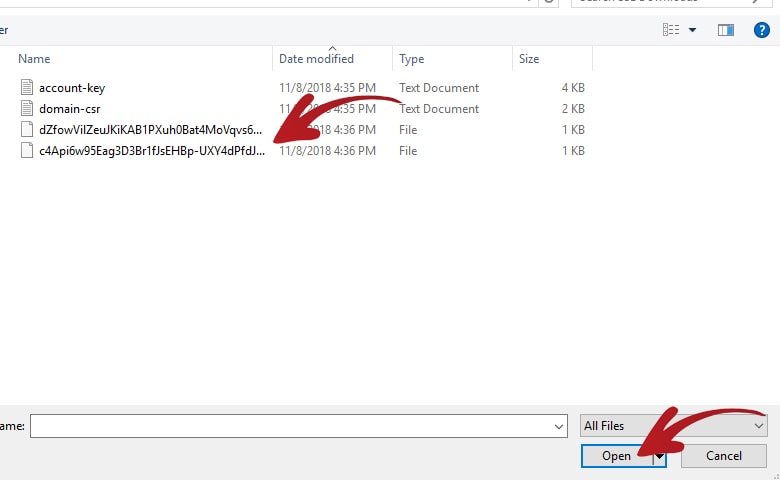
Do the same on the second file.
Make sure to upload both of the files and after that click the Go Back link below the upload page.
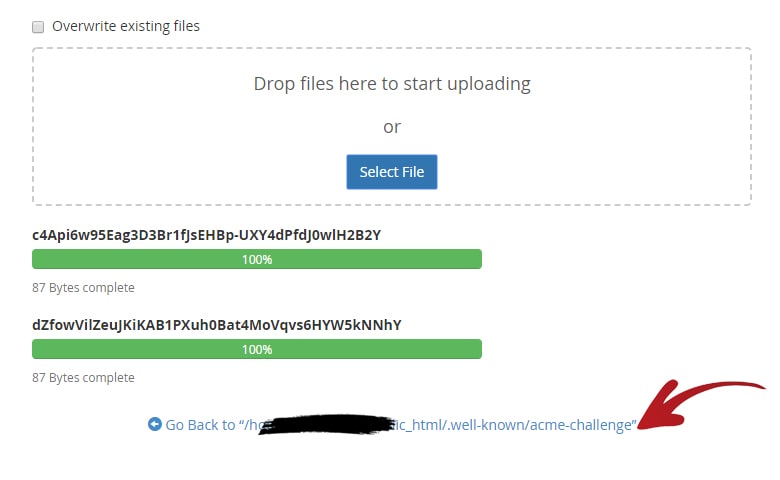
You should now see that the acme-challenge folder contains both of the files we just uploaded.
We can now go back to the ZeroSSL.com verification step.
5. Generating The SSL Certificates
Now that we uploaded the files necessary for the ownership verification.
We need to go back to the Verification step and click the Next button.
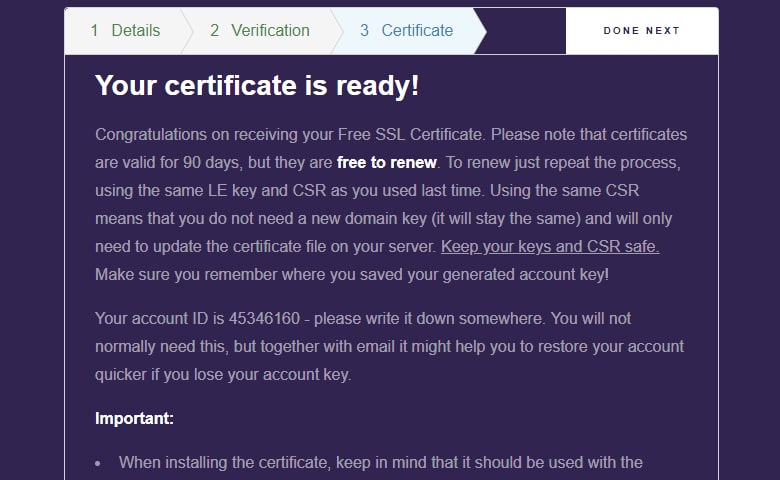
Finally we have now successfully generated our SSL certificates!
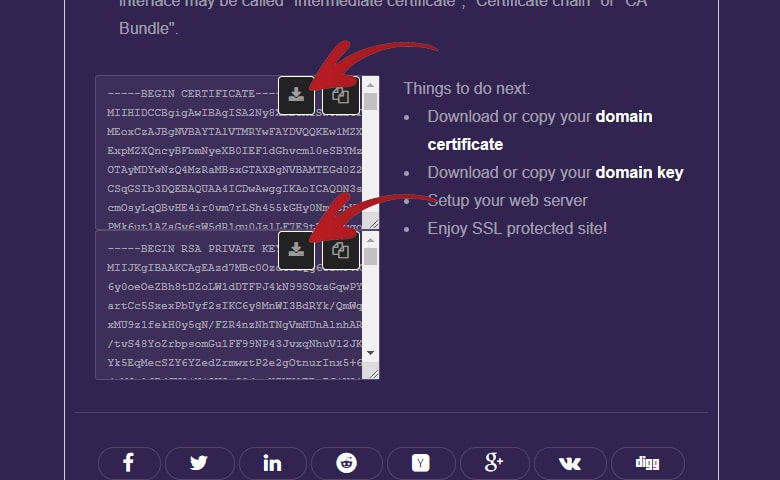
Now we just need to scroll down until we see these two textarea fields.
Within each one of them, there is a download icon button.
Click both Download icon buttons to get your SSL certificates.
6. Installing The SSL Certificates
The next step is to install your SSL certificate to HostGator.
First is you need to go back to your HostGator cPanel.
Once inside, find and click the SSL/TLS icon. You can find this normally under the Security section.
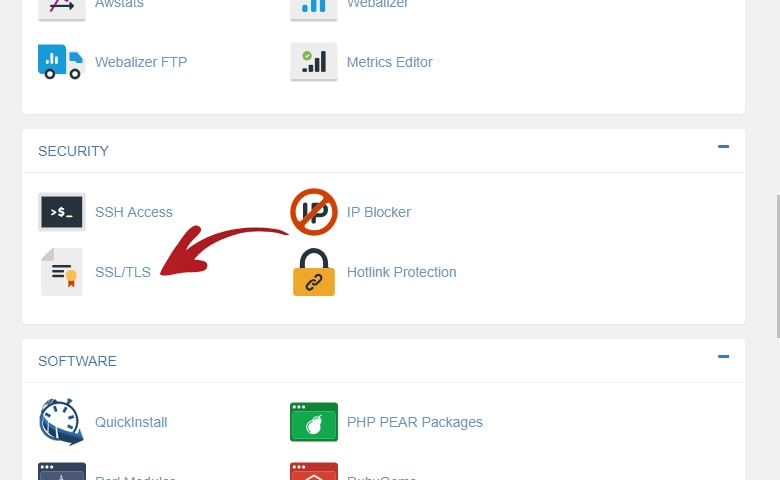
On the next page, find and click the Manage SSL Sites link.
You can normally find this at the bottom of the page.
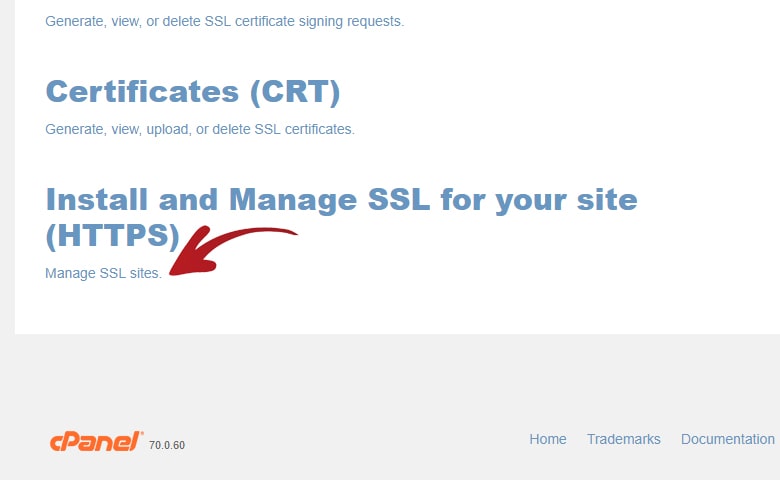
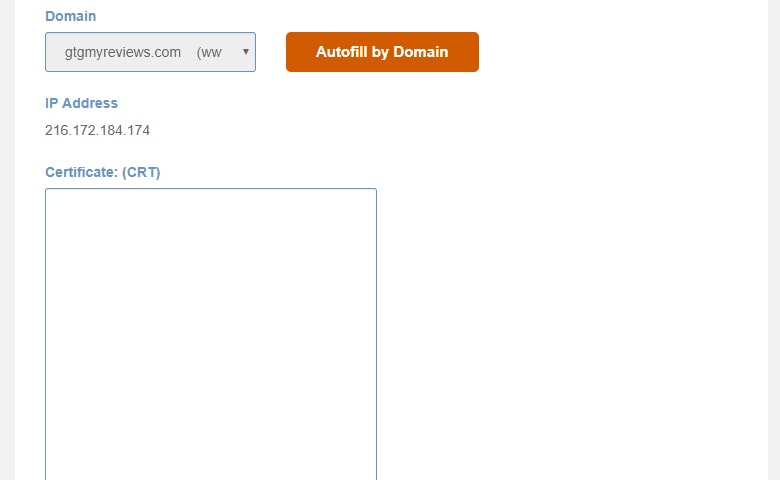
You will then be redirected to a page that looks similar to this. Scroll down until you see this section.
Now this section has 3 textarea fields that you need to fill-up.
You may be worried because you only downloaded 2 text files.
Do not worry, because one of those text files actually contains 2 certificates.
Now let’s open the text files we just download.
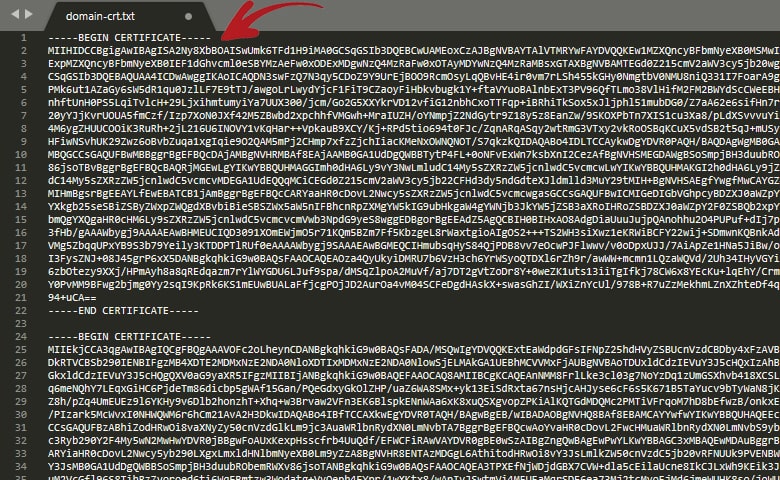
The first one we will open is the text file named domain-crt which is the text file that contains 2 certificates.
You can open it with Notepad or whatever text editor you prefer.
In my case I used Sublime Text which is why it looks like this.
As you can see it contains two certificates.
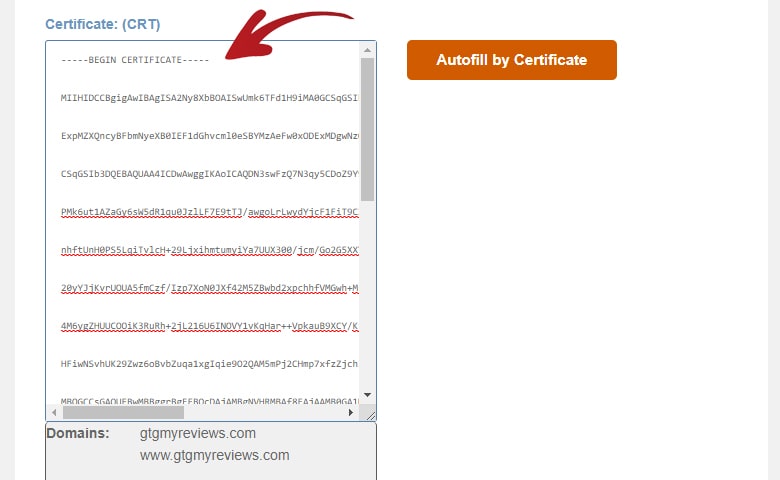
For now let’s copy the first certificate text which is the top one.
After you copied it, go back to the Manage SSL Sites page and paste it on the Certificate (CRT) textarea field.
Next is let’s go back to the text file and copy the second certificate which is the bottom one.
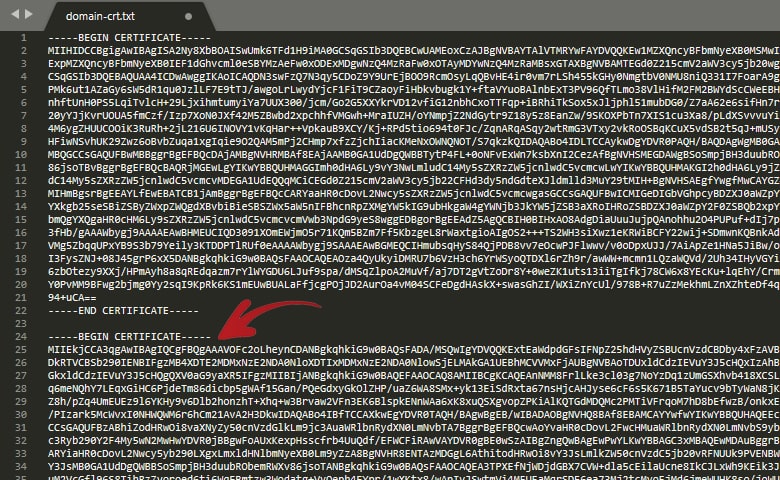
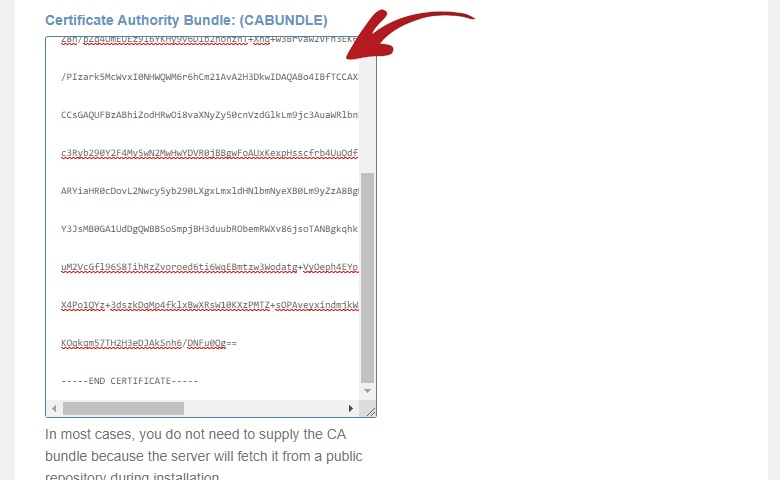
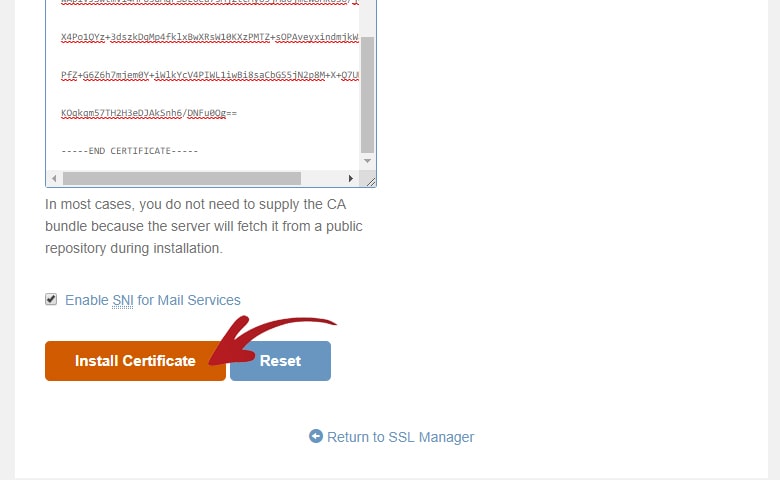
After you copied it, go back to the Manage SSL Sites page again and paste it on the Certificate Authority Bundle (CABUNDLE) textarea field.
We can now close our first text file and proceed on opening the second text file.
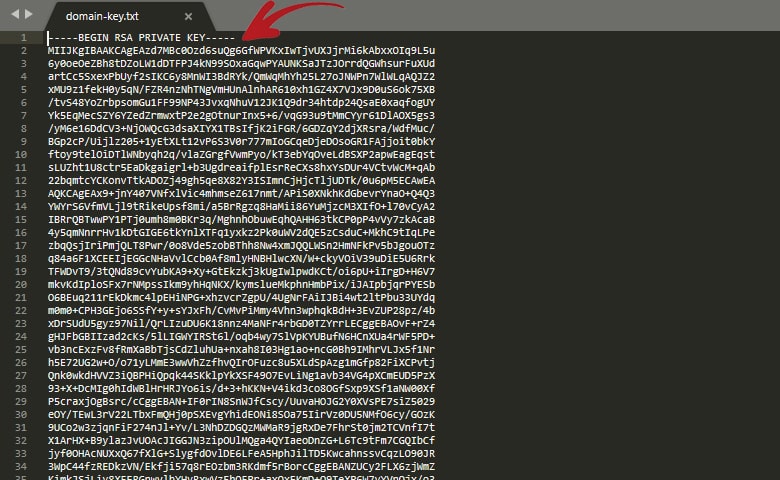
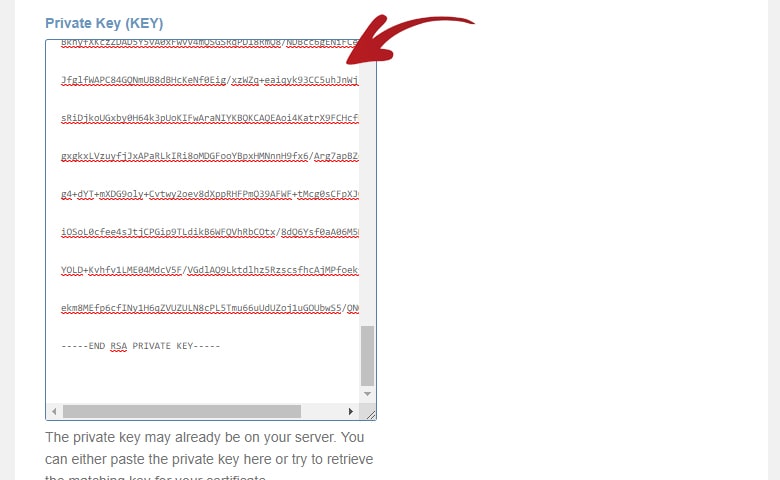
The second text file we need to open is named domain-key.
Once you opened it, it should look like something like this.
Now copy all the certificate text in this text file.
Once you copied it, go back to the Manage SSL Sites page and paste it on the Private Key (KEY) textarea field.
Now we got all the 3 required fields filled up.
We can now scroll down at the bottom of the page and click the Install Certificate button.
At first it will show you a loading bar but as soon as it finished installing. You should see this confirmation popup.
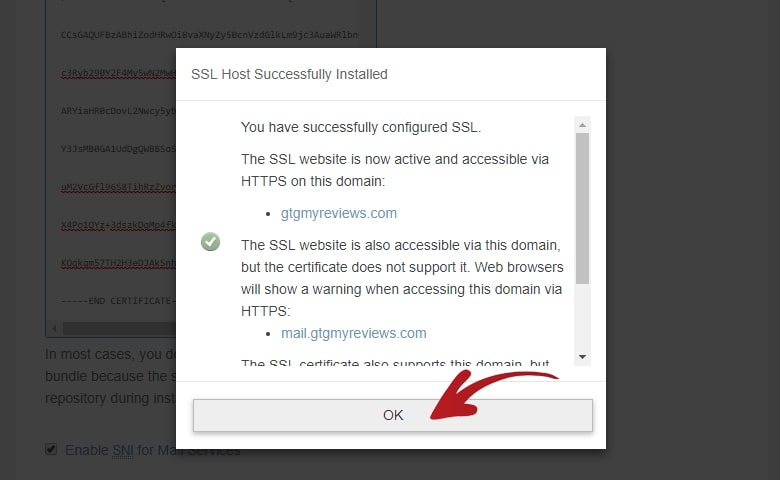
That is it! Just click the OK button.
We now have a free SSL certificate successfully installed in our website.
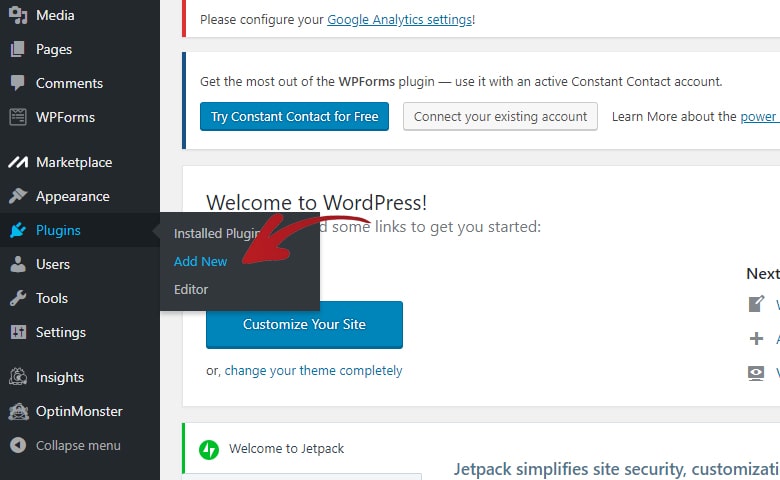
7. Updating WordPress URL to HTTPS
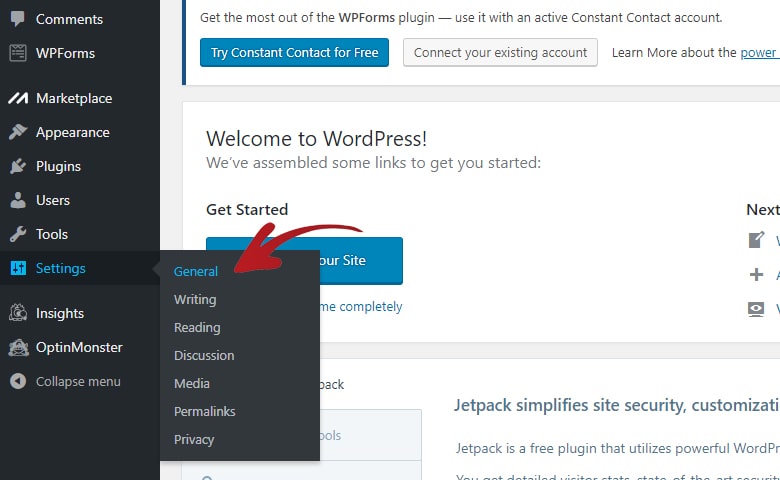
The next step is we need to change our WordPress settings URL to HTTPS.
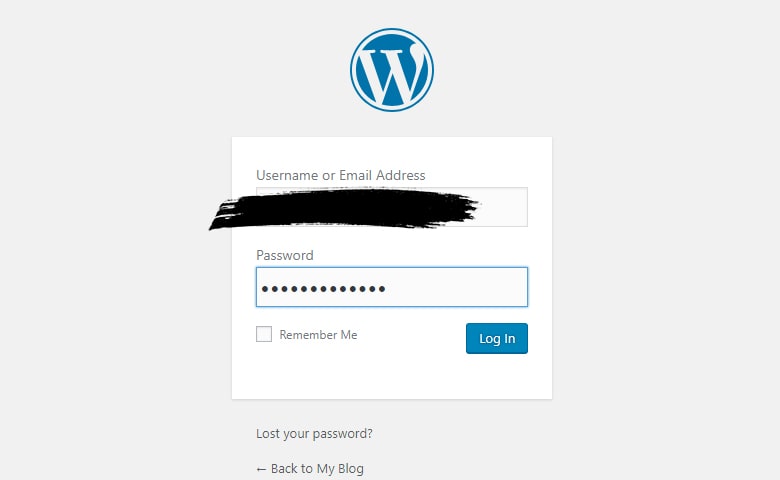
To do this, first log-in to your WordPress Dashboard.
Once inside, navigate to Settings > General.
On the WordPress Address (URL) and Site Address (URL), update the http: to https:
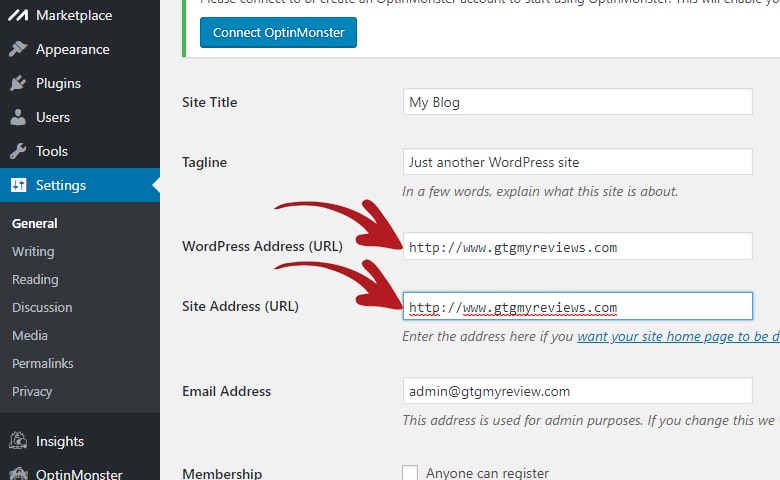
After you did that, scroll down and click the Save Changes button.
You will then be logged out so you will need to login again to proceed to the next step.
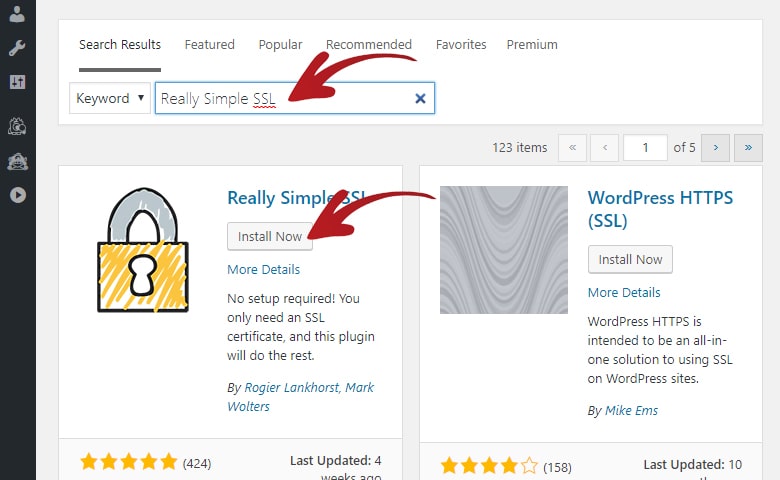
8. Install Really Simple SSL Plugin
The next step is to install the Really Simple SSL plugin for WordPress.
This plugin will automatically update the URLs of your media files in each post and page to HTTPS.
This will save you a lot of time instead of opening each file and changing the URLs manually.
Once inside the WordPress Dashboard, navigate to Plugins > Add New.
One the search box, type Really Simple SSL. The plugin we need should appear as the first result.
Click on the Install Now button.
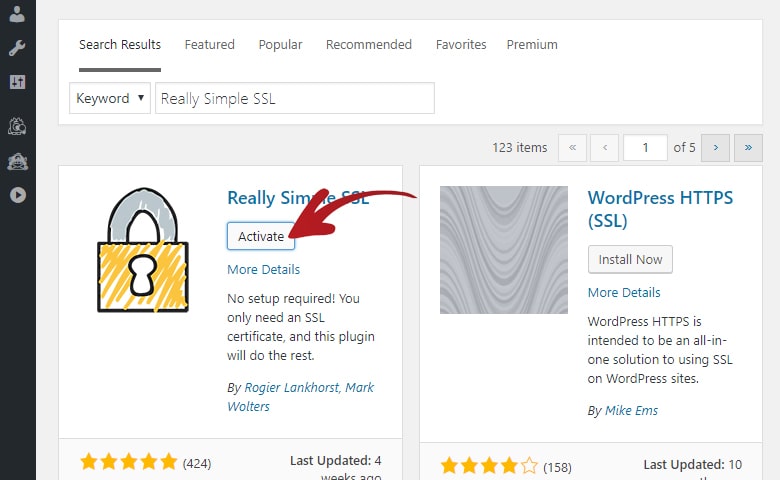
After it finished installing click the Activate button.
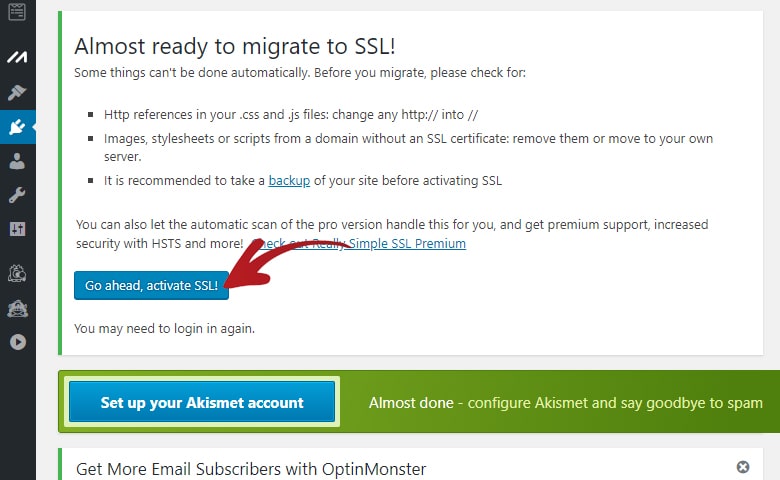
The page will then refresh and you should see this large message box.
Click the Go Ahead, Activate SSL! button on the message box.
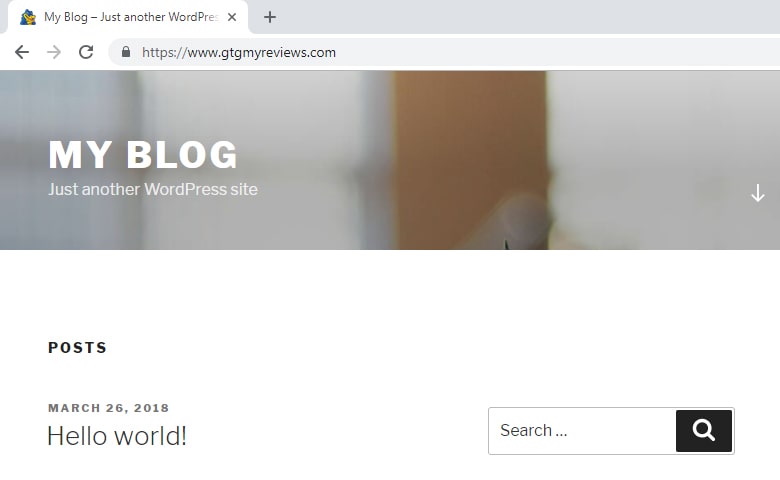
That is it! You have now successfully installed your free SSL and made your website HTTPS ready.
You can now visit your website’s domain and it should automatically redirect you to the HTTPS version.
Conclusion
I understand that it is a pretty long step-by-step guide but honestly it is pretty straightforward.
There is no coding part just mainly copy, paste, opening links, logging-in and checking checkboxes.
Kudos to Let’s Encrypt for providing us with free SSL certificates for a couple of years now.
If you are in a budget but really interested in getting an SSL for your website then consider using the Let’s Encrypt free SSL.
Aside from obvious security benefits. Customers are most likely to fill-up your forms if they see that secured icon in your website’s URL.
If you are considering DreamHost to host your website. You can also install a free SSL on it. Here is my step-by-step guide about it if you are interested.