In this guide, I will show you how to get a free SSL for DreamHost hosting.
It is highly recommended for any website owners nowadays to use SSL in their website.
Aside from the obvious security benefits due to encrypted data transfer.
Many visitors are also most likely to give you their personal information if they see that secure padlock icon on your website’s URL address bar.
The best thing about this though is that nowadays you do not really need to spend a fortune to get an SSL for your website.
This is because there is a free SSL now from Let’s Encrypt. Basically Let’s Encrypt is a free, automated and open Certificate Authority.
The only difference between Let’s Encrypt and your regular SSL that you buy yearly. Is that you will need to renew your Let’s Encrypt SSL certificate every 3 months.
If you are in DreamHost hosting, they integrated Let’s Encrypt into their Web Panel already.
So the process of installing their free SSL is so much easier.
This is because you do not need to go to an external website anymore to get your free Let’s Encrypt SSL certificate.
It can be done directly from their Web Panel.
Here is your step-by-step guide on how to get a free SSL for DreamHost.
1. Login to DreamHost Web Panel
The very first step is to log-in to your DreamHost Web Panel.

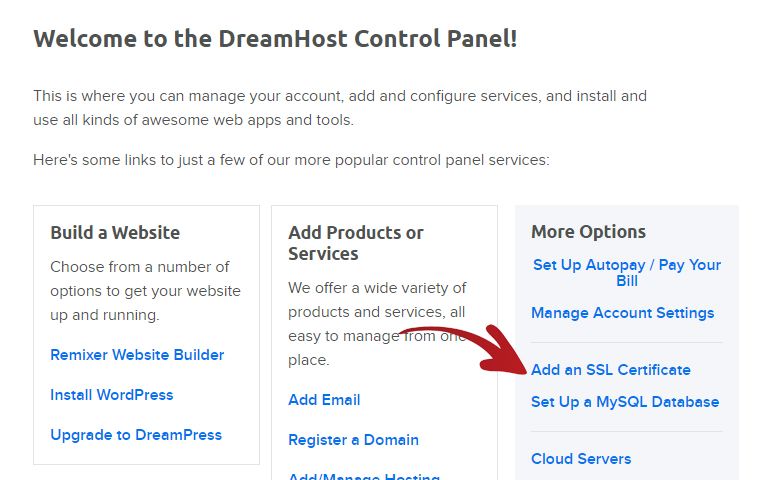
2. Getting the Free SSL
Once logged-in, click the Add an SSL Certificate link under the More Options section.
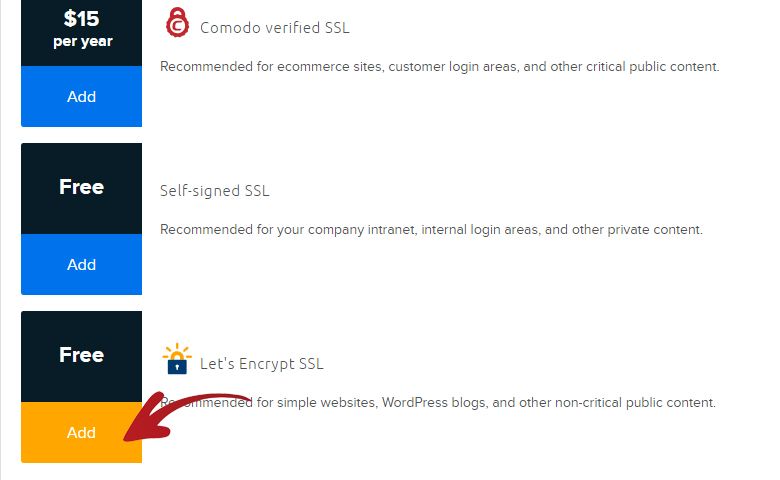
You will be redirected to a page where you can choose which SSL certificate you want to use.
Click the Let’s Encrypt SSL which is 100% free.
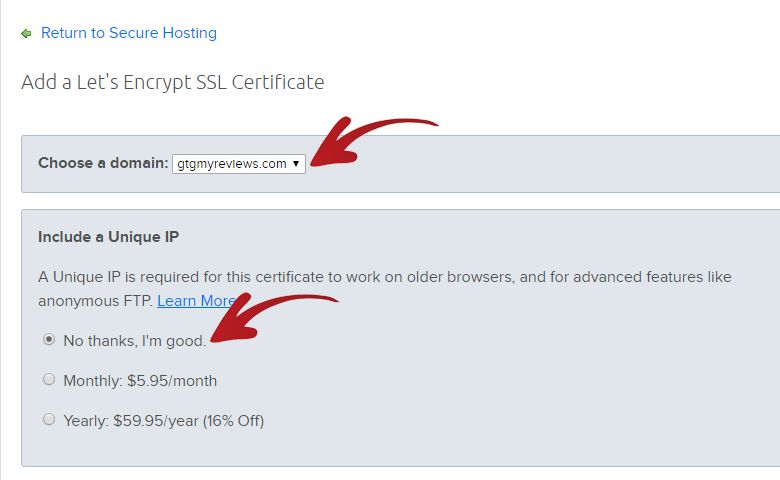
On the next page, you will need to Choose a Domain where you want to install the free SSL.
Click on the dropdown and choose your respective domain.
Also make sure that you check No Thanks, I’m Good under the Include a Unique IP section.
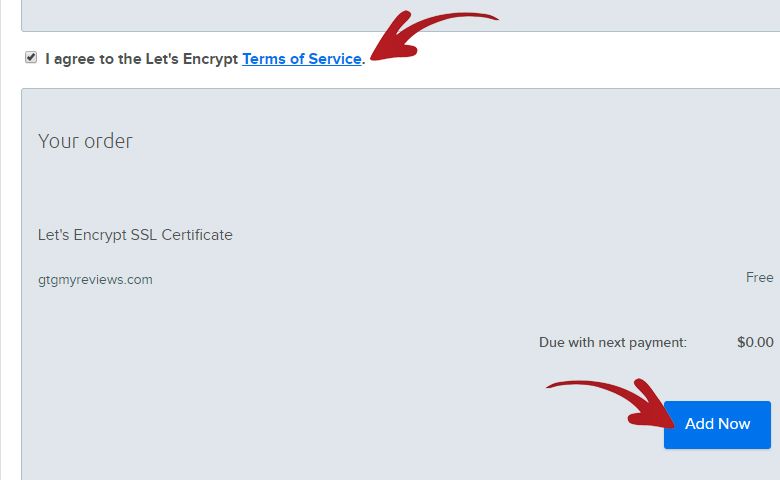
Next is you will have to scroll down and check the I Agree To The Let’s Encrypt Terms of Service checkbox.
Then finally click the Add Now button to start installing your free SSL.
After you click the Add Now button, the button will change to Processing.
Just wait for it to finish processing.

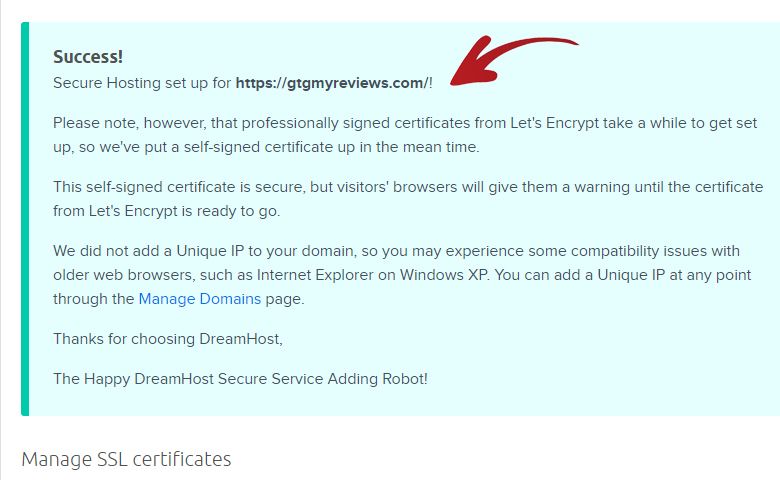
As soon the as the processing is finished, it will redirect you to this page.
This means that the free SSL installation to your domain is successful.
Now you just have to wait a few minutes for the free SSL to be fully implemented.
3. Updating Your htaccess File
While waiting, let’s proceed on updating your htaccess file.
Basically we want to add a couple lines of code on it to make it automatically redirect our URL to the HTTPS version of our site.
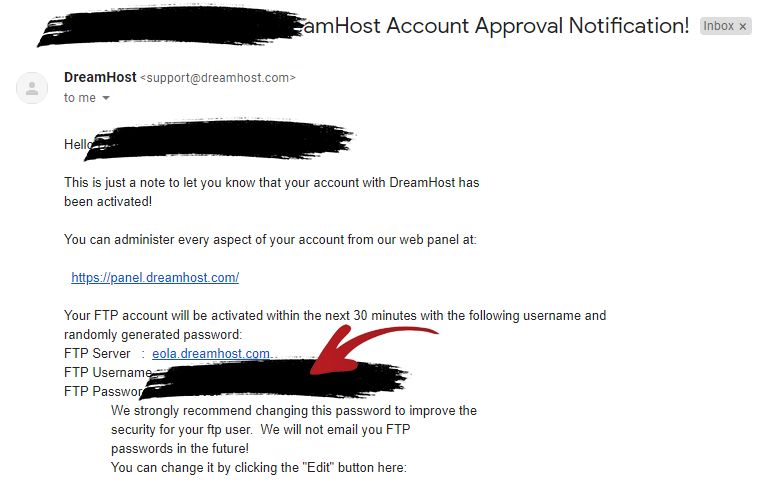
The very first step is to find out our FTP Server, FTP Username and FTP Password.
To do this, we will need to open the email from DreamHost which has a subject DreamHost Account Approval Notification!
On this email we will find a section which contains our FTP Server, FTP Username and FTP Password.
Take note of these details now as we will use them on the next step.
Next is we now have to login to an FTP Client so we can get access to the htaccess file and edit it.
The FTP Client I will be using in the steps below is FileZilla.
If you do not have it yet, feel free to click the link above and download it.
Once inside FileZilla, click on the Site Manager button.
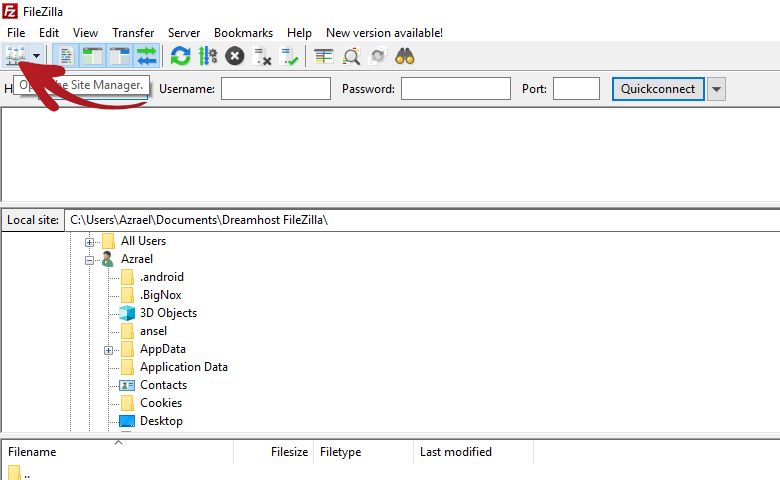
A popup will then show, click on the New Site button so we can add our DreamHost website.

It will then show you an editable text under My Sites.
Go ahead and name your New Site however you like then press Enter.
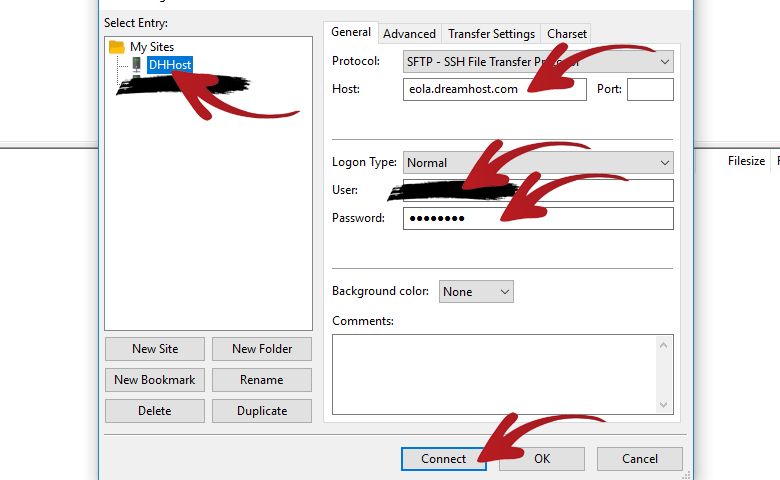
In my case, I named it DHHost.
Next is focus on the right side namely on the Protocol, Host, Logon Type, User and Password.
Make sure they are set as follows:
- Protocol – Make sure this is SFTP.
- Host – This is your FTP Host that can be found in the Email I mentioned earlier.
- Logon Type – Set this to Normal.
- User – This is your FTP Username that can be found in the Email I mentioned earlier.
- Password – This is your FTP Password that can be found in the Email I mentioned earlier.
After you filled up all the necessary fields. Click the Connect button.
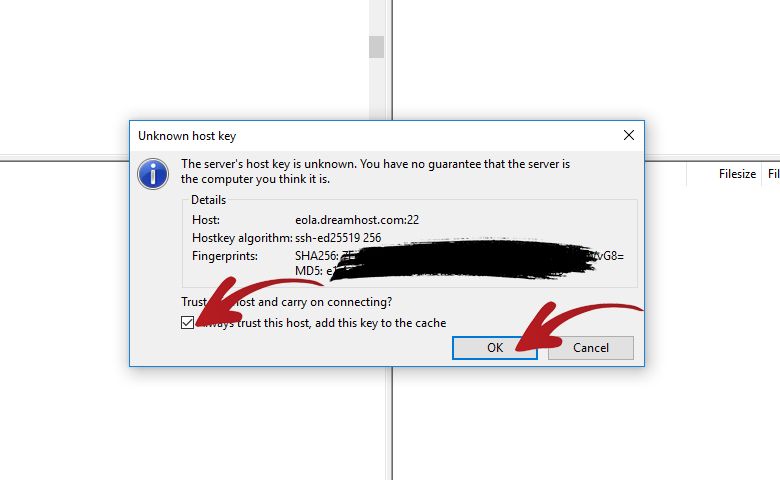
It will then show you this popup. This popup only shows because this is your first time logging in and your system doesn’t know the host key yet.
Think about it like you meeting a new sketchy person which means you do not know anything about that person yet. So your subconscious is telling you to be careful.
Check the Always Trust This Host checkbox and click the OK button.
The FileZilla client will now start connecting and start retrieving your file list from DreamHost.
As soon as it finished connecting and retrieving your file list. The right side of FileZilla should now look like this.
Double click on your domain name folder to open it.
In my case it is gtgmyreviews.com folder.
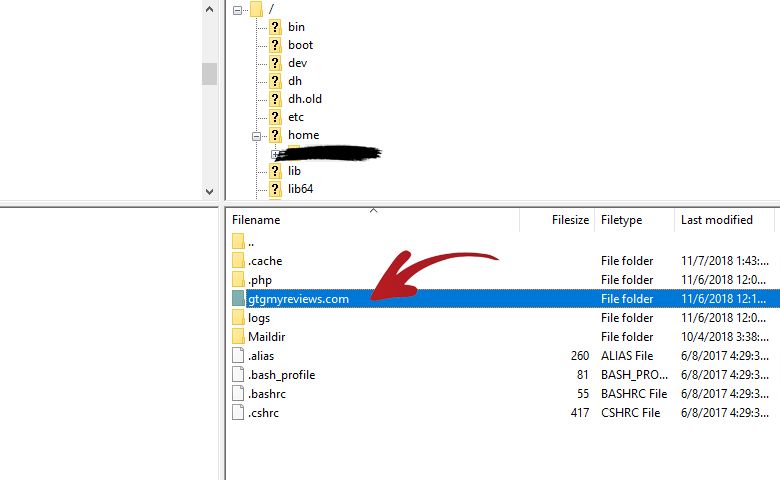
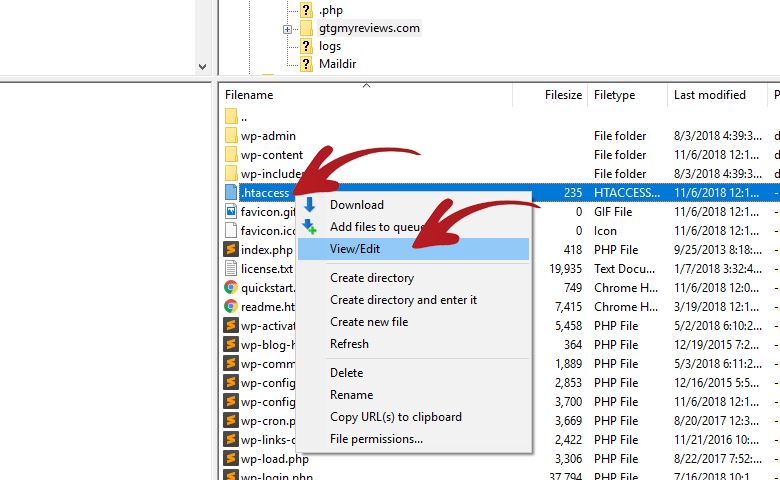
You should now be redirected to your domain name folder and inside you will see the htaccess file.
All you have to do is right click on it and select View/Edit from the dropdown.
It will then give you this popup which allows you to choose which editor you want to use to edit the htaccess file.
If you do not have a preferred editor just choose the Use Default Editor option which will open the htaccess file in Notepad.
In my case, I prefer to use the Sublime Text editor so I chose the Use Custom Program option.
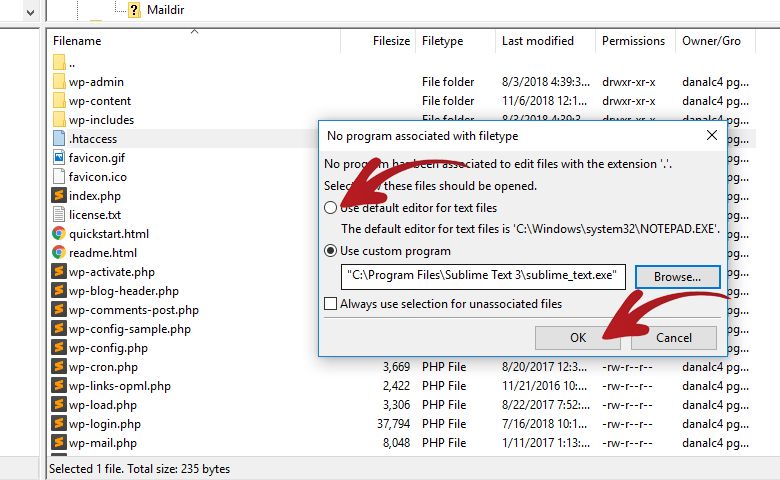
After you chose your editor, click the OK button.
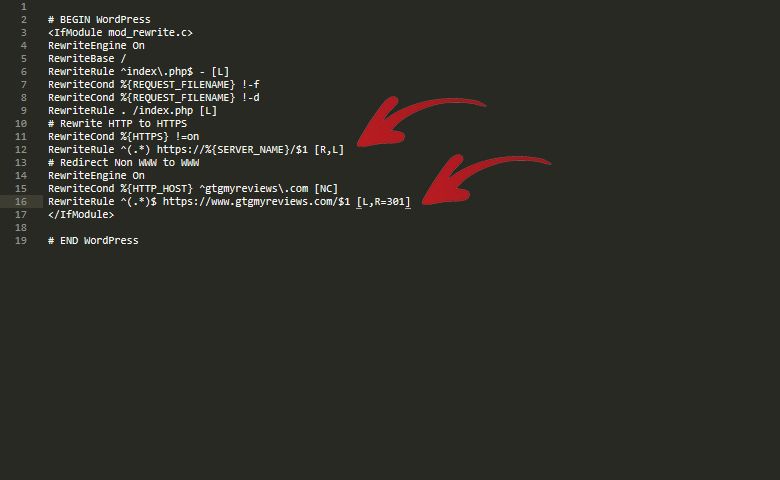
It will then open the htaccess file in the editor you have chosen and it will look like this by default.

Now all you have to do is add these lines of code to your htaccess file:
# Rewrite HTTP to HTTPS
RewriteCond %{HTTPS} !=on
RewriteRule ^(.*) https://%{SERVER_NAME}/$1 [R,L]
# Redirect Non WWW to WWW
RewriteEngine On
RewriteCond %{HTTP_HOST} ^goodtechguru\.com [NC]
RewriteRule ^(.*)$ https://www.goodtechguru.com/$1 [L,R=301]
The first 3 lines of codes are the only ones needed for the HTTP to HTTPS redirect.
The last 4 lines of codes are optional, what it does is redirect your visitors to the WWW version of your website even if they didn’t type the WWW in the browser URL.
In case you used the last 4 lines, do not forget to change the goodtechguru.com domain to your domain name.
After you added the codes above, your htaccess file should now look like this.
All you have to do now is save the file. The most common shortcut to do this is CTRL + S in Windows.
Or by going to the menu File > Save.
Important! Do not use Save As.
After you clicked Save. You can now close your editor and go back to FileZilla.
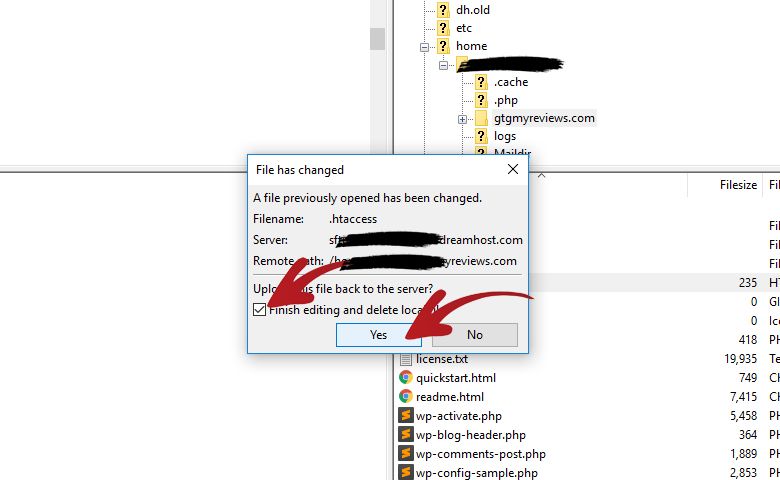
Once you are in FileZilla, you should see this popup already waiting for you.
Make sure to check the Finish Editing checkbox and click the Yes button.
It will now start uploading the new version of your htaccess to DreamHost. You can see the upload progress in the bottom section of FileZilla.
It will look like this while it is uploading.
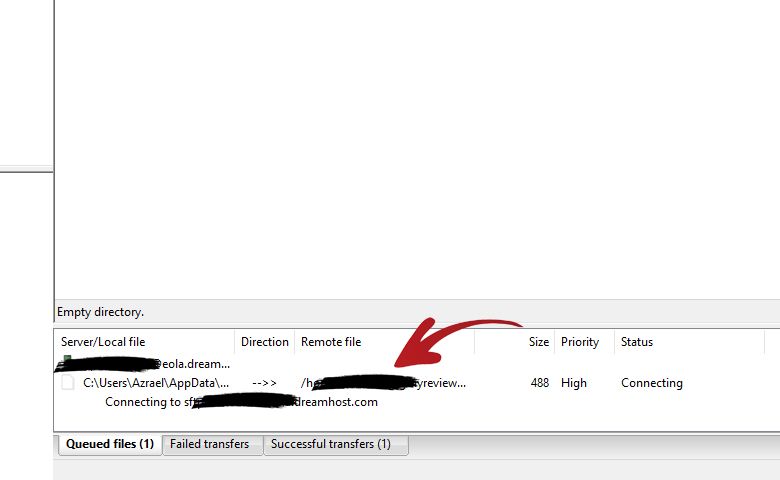
The upload process should only take a few seconds.
After the upload is finished you can now log-in to your WordPress dashboard.
4. Installing Really Simple SSL Plugin
The next step is to install the Really Simple SSL plugin.
Basically what we need this plugin for is it will automatically convert out media links to HTTPS.
Without the need for us to edit each of our post that has media links manually.
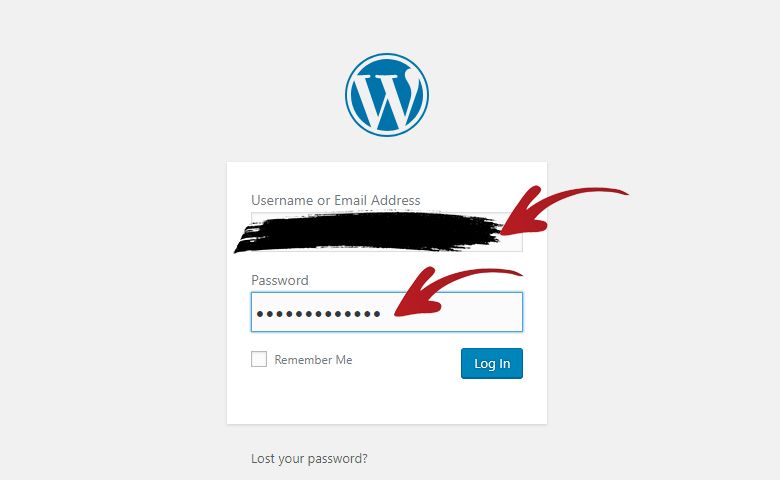
To start the install process you should first login to your WordPress dashboard.
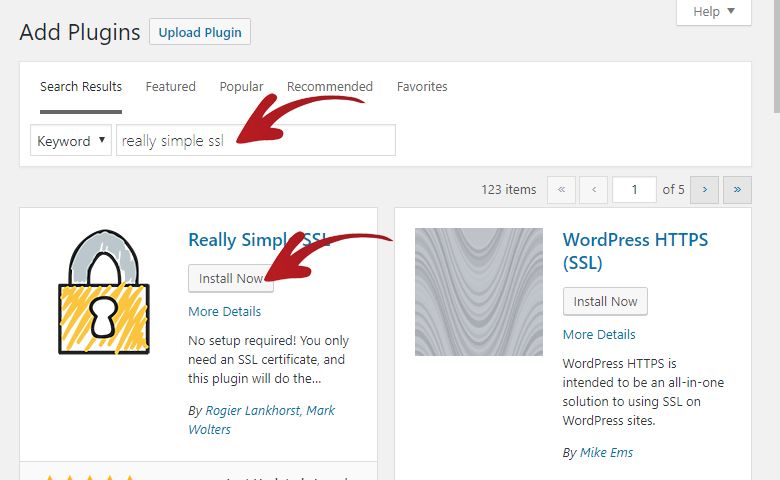
Once logged-in go to the Plugins > Add New section.

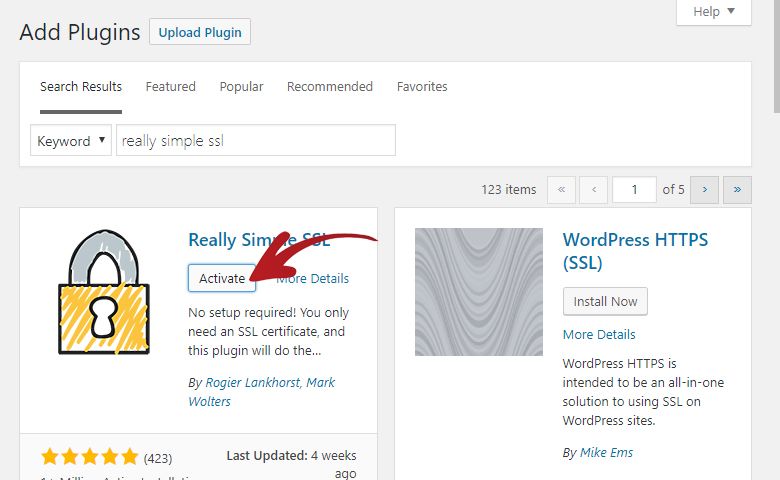
On the Search Box type Really Simple SSL.
It should be the first result.
Click the Install Now button on the Really Simple SSL result box.
After it finished installing, click the Activate button.
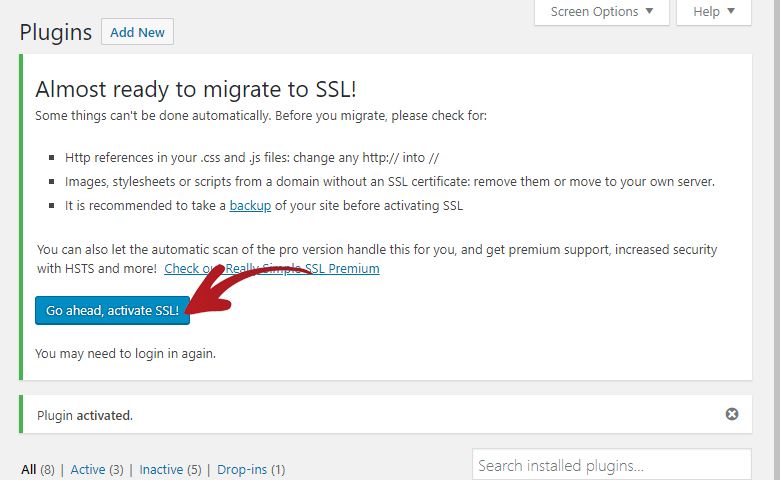
It will then redirect you to your plugins page and you should see this message box.
Click the Go Ahead, Activate SSL button.
The page will then refresh and it will now show you this SSL Activated! message box.
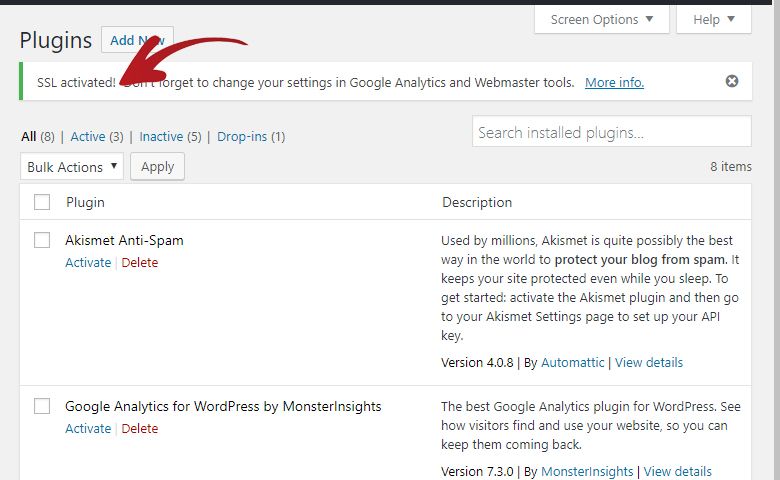
That is it!
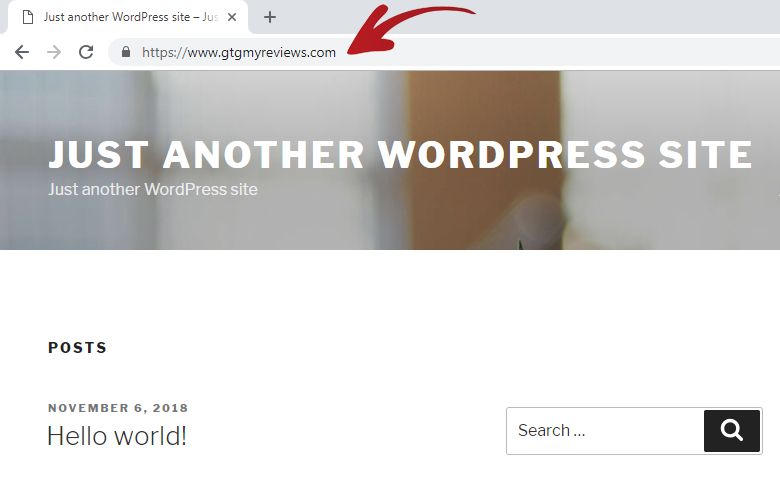
5. Visit You Domain
You can now visit your domain name and it should automatically redirect you to the HTTPS version of your website.
All your media files should also now be in the HTTPS version.
Conclusion
I really admire DreamHost for integrating the Let’s Encrypt SSL into their system.
In other web hosting providers, the process is completely different but I will start creating guides for them too.
Basically, on the most common process you will need to get your Let’s Encrypt SSL from a different website.
Just make sure to set a reminder in your smartphone that you will need to renew your Let’s Encrypt SSL every 3 months.
If you are interested in starting a blog with DreamHost. Then you might be interested in reading my step-by-step guide on how to do it.