In this article, I will show you how to start a blog with the Google Cloud Platform.
If you are a pretty serious starter blogger that wants to provide the best user experience to your visitors immediately. Then you might want to consider hosting your blog website at the Google Cloud Platform.
Google Cloud Platform is known for its lightning fast cloud virtual servers. So this means hosting your blog website on it will give your visitors ultra fast loading speeds.
Being a Cloud hosting, this also means that you will be able to choose a specific data center where you want to put your blog website.
The best practice on this is to put your blog website on a data center close to your target audience.
Here is your step-by-step guide on how to start a blog with Google Cloud Platform.
1. Signup to Gmail Account
If you already have a Gmail Account then you can skip this step.
But if you don’t, go ahead and signup for a Gmail Account as with this. You can automatically sign-in to the Google Cloud Platform.
2. Go to Google Cloud Platform Marketplace
Once you have a Gmail Account, you can now to go the Google Cloud Platform Marketplace.
You will be given a $300 signup bonus which you can use for 12 months.
That is why you will be able to create your virtual machines immediately without a need to cash in right away.
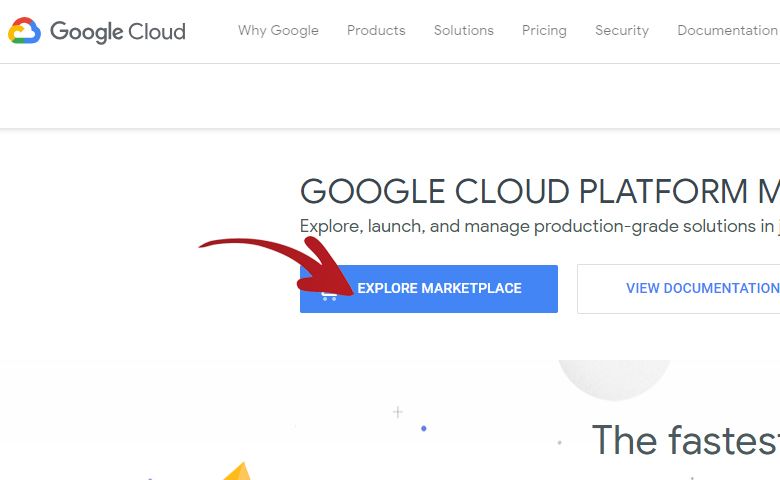
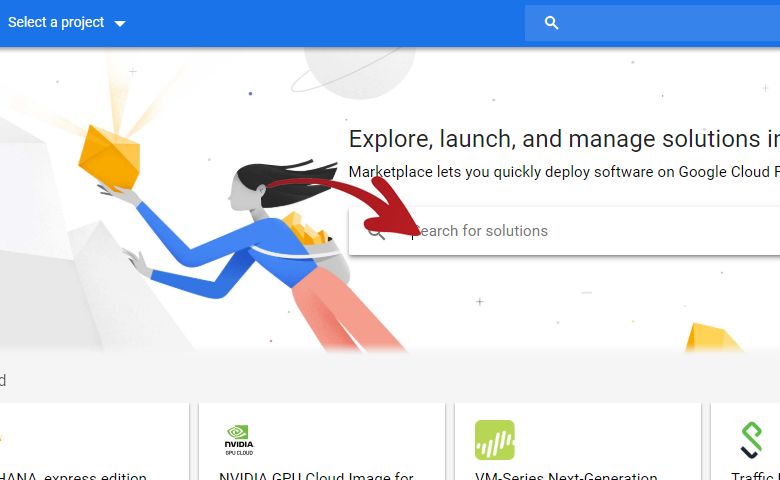
On the Marketplace page, click on the Explore Marketplace button.
You will be redirected to the next page which has a Search box.
On the Search box, type WordPress.
After you typed WordPress, you will be redirected to a page with search results for WordPress.
Click on the box result similar to the one shown on the image below.
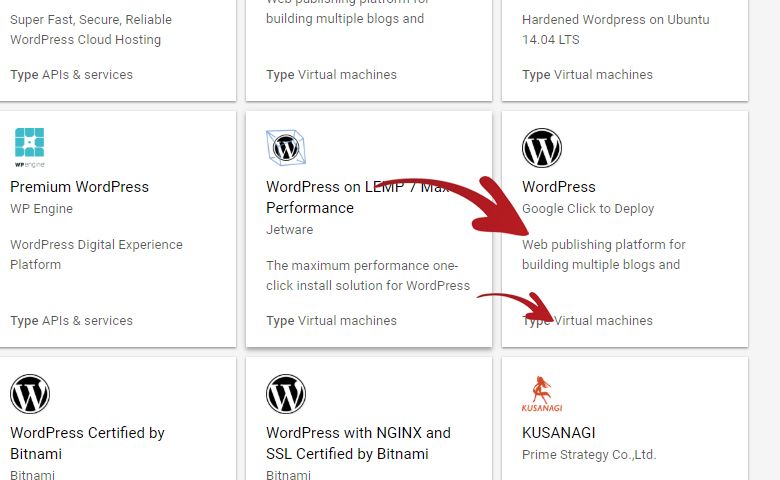
Make sure that it says Google Click to Deploy below the WordPress title.
And also make sure that the Type is Virtual Machines.
After you click on it, you will be redirected to this page:
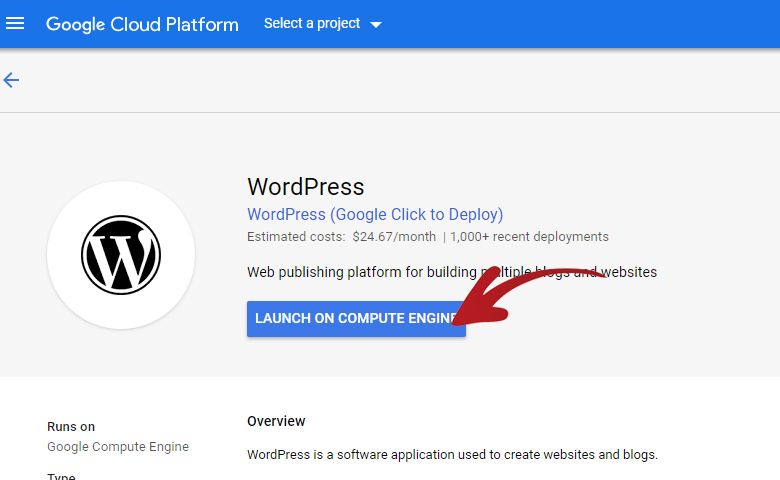
Click on the Launch On Compute Engine button.
After you click on it, it will show you a popup asking which Project you want to put your virtual machine under.
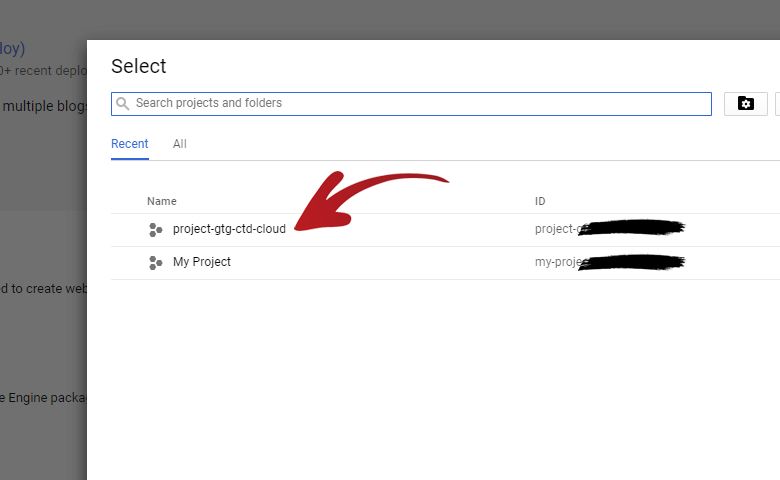
In my case, I created a new project named project-gtg-ctd-cloud and chose it.
3. Configuring Your Virtual Machine
On the next page you will be able to configure your virtual machine.
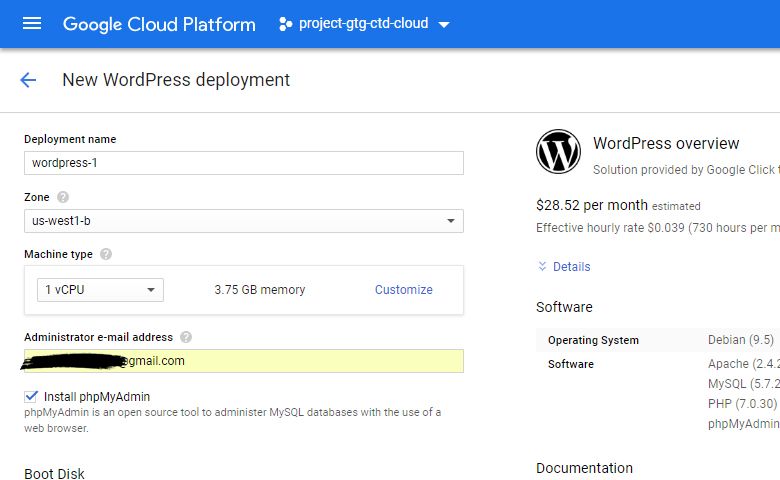
The options I chose are:
- Deployment Name – wordpress-1
- Zone – us-west1-b
- Machine Type – 1 vCPU / 3.75GB Memory
- Administrative Email Address – Your Email
- Install phpMyAdmin – Checked
- Boot Disk Type – SSD Persistent Disk
- Boot Disk Size in GB – 25GB
- Network Name – Default
- Sub-Network Name – Default
- Allow HTTP Traffic – Checked
- Allow HTTPS Traffic – Checked
- More Options – Default
After you setup everything above you can now click the Deploy button.
The virtual machine will now start deploying and will take a minute to fully deploy.
When your virtual machine is fully deployed you will see something like in the image below.
The important details are on the right side.
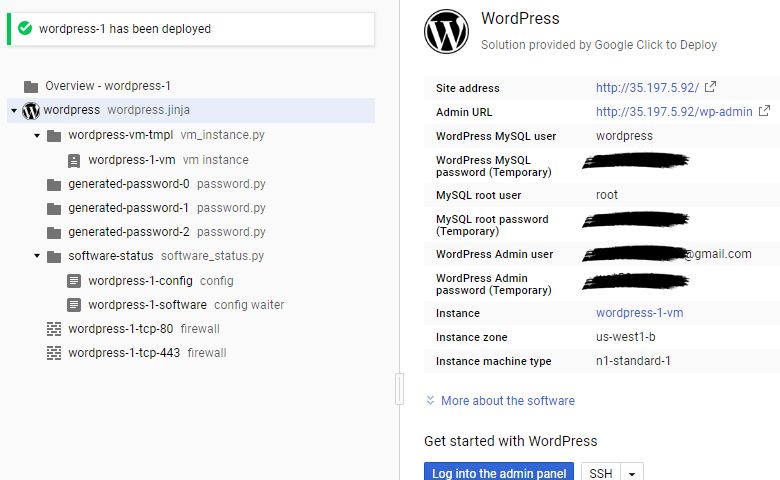
It contains your Site IP Address, when you click on it you will see the front-end of your website with the default theme.
Under it is the WordPress Admin URL, when you click on it you will be redirected to the WordPress Login Page.
You can login on it using the WordPress Admin User and WordPress Admin Password given also on the right side details.
It is recommended that you change you WordPress Admin Password immediately.
4. Pointing Your Domain To Google Cloud Platform WordPress Website
As you noticed your website currently only has an IP address.
The next step is to point your domain to your WordPress website in Google Cloud Platform.
This way you can access your Google Cloud Platform WordPress website through your domain.
5. Enabling Google Cloud DNS API
The very first step you need to do in order to point your domain in the Google Cloud Platform is to enable the Google Cloud DNS API.
You can do this by going to the APIs and Services:
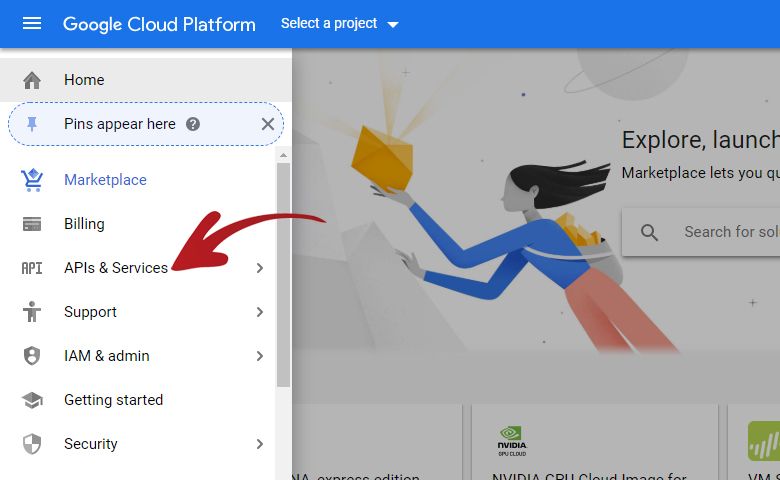
This is on the left sidebar that shows when you click the menu button on the left side of Google Cloud Platform logo.
On the next page you will see something like in the image below.
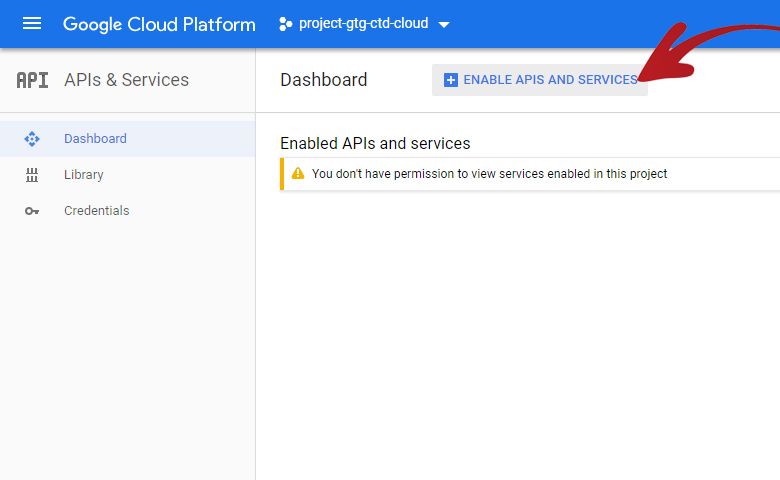
Click on the Enable APIs and Services button.
You will be redirected on a page with a Search box.
On the Search box, type DNS.

You will be redirected on a page with the search result for DNS.
Currently it is only one item so you cannot go wrong here. Just make sure it says Google Cloud DNS API.
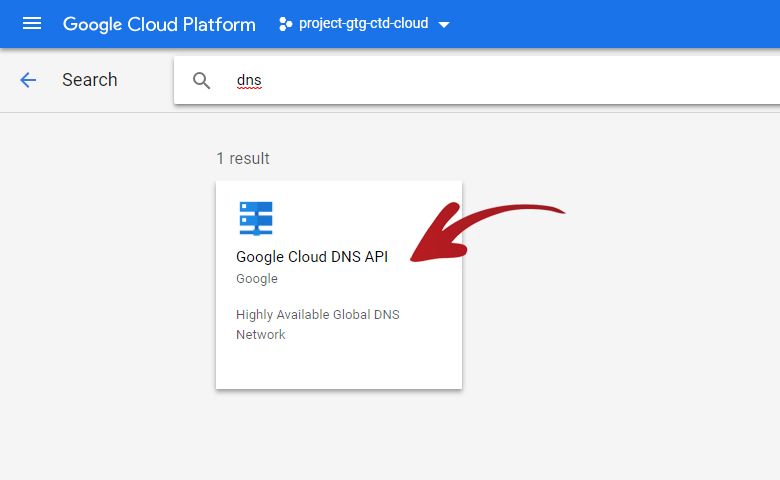
Click on the Google Cloud DNS API.
On the next page, you will have a page with a button to Enable the Google Cloud DNS API.
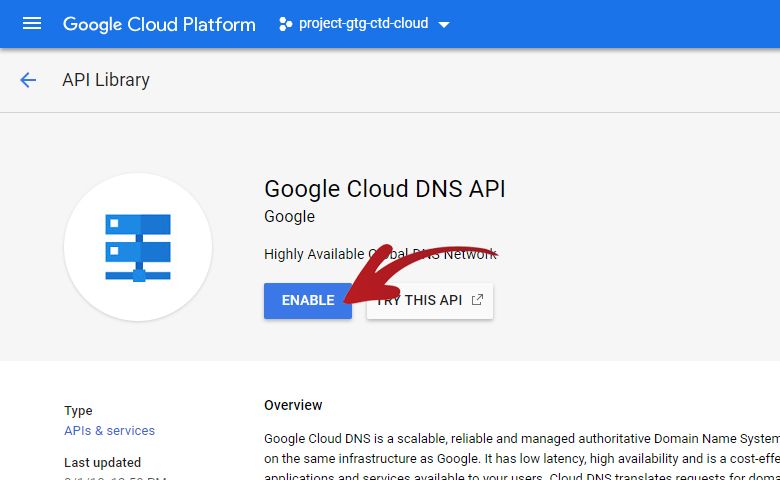
Click on the Enable button.
After you have enabled the Google Cloud DNS API. You can now start creating records.
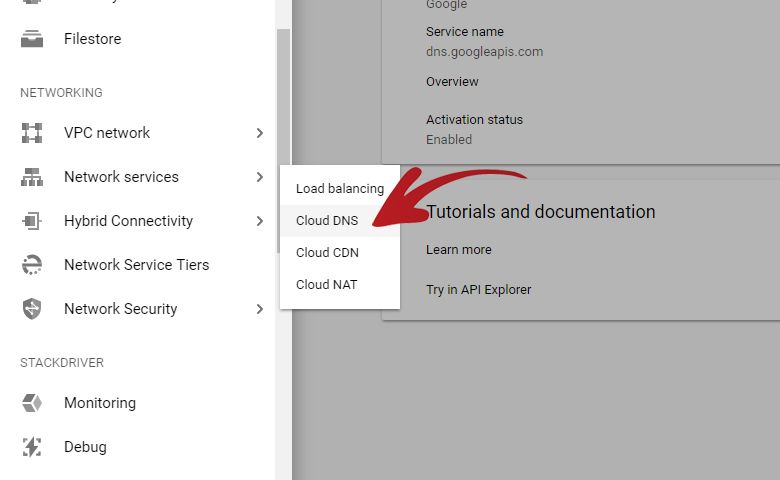
6. Creating Record Names
Open the left sidebar menu again.
Then navigate to Networking > Network Services > Cloud DNS.
You will be redirected to a page where you can now create a zone.
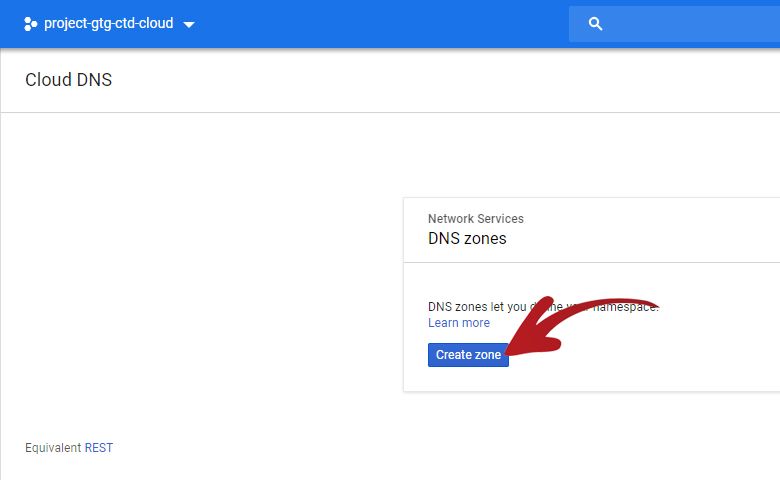
Click the Create Zone button.
On the next page you will need to add a Zone Name and DNS Name.
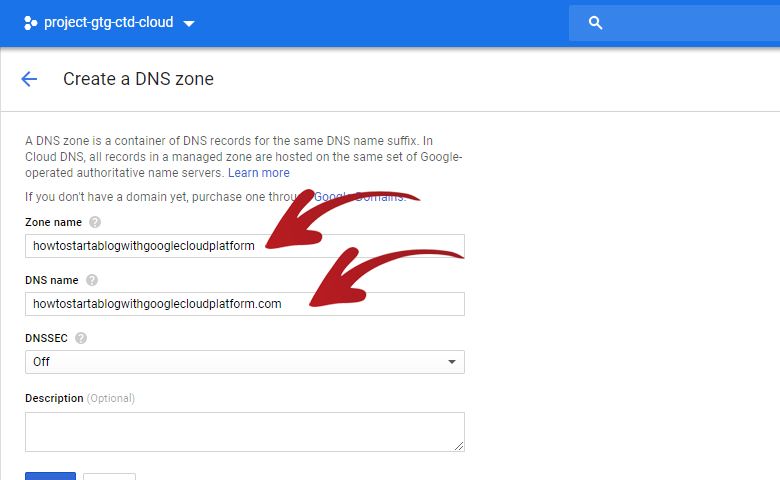
The ideal Zone Name is your domain without the extension.
And the ideal DNS Name is you full domain name with extension.
See how I did it in the above image.
After you setup the Zone Name and DNS Name. Click the Create button.
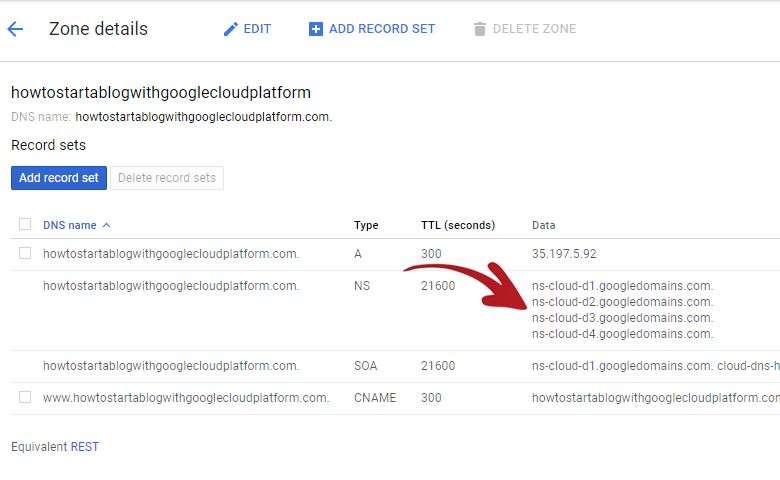
The next step is to connect the site IP address to the domain name.
To do this Click the Add Record Set button.
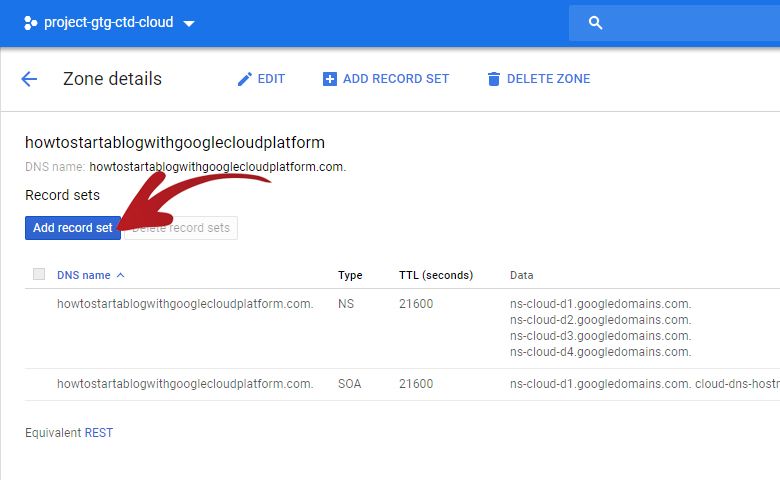
On the next page you will see something like this:
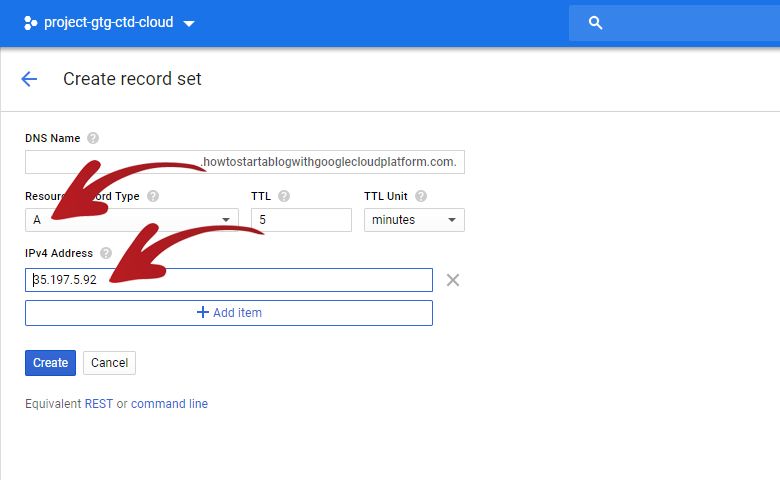
Make sure that the Resource Record Type is set to A record.
On the IPv4 Address type your Google Cloud Platform WordPress Site IP Address.
This is the Site IP Address shown on the right side after your WordPress virtual machine finished deploying.
This is also the IP address that you currently use to access the front-end of your website.
After you setup the Resource Record Type and IPv4 Address click the Create button.
This next step is optional.
Do this if you want to use the www version of your domain.
To do this, click the Add Record Set button again.
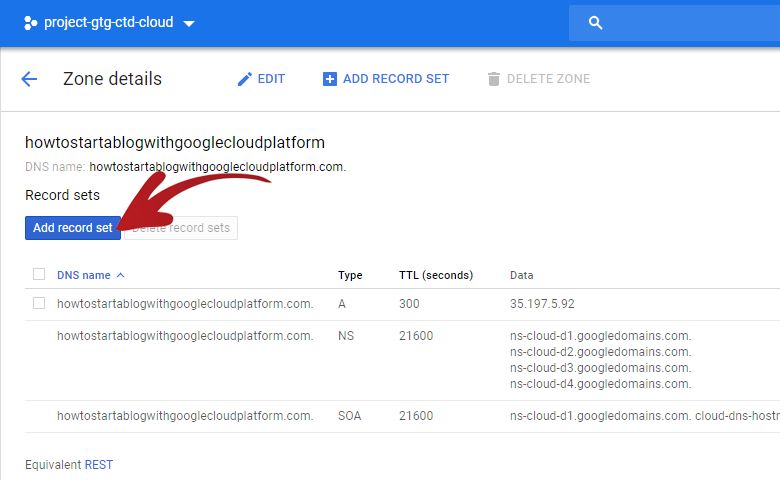
On the Create Record Set page, add www in the DNS Name field.
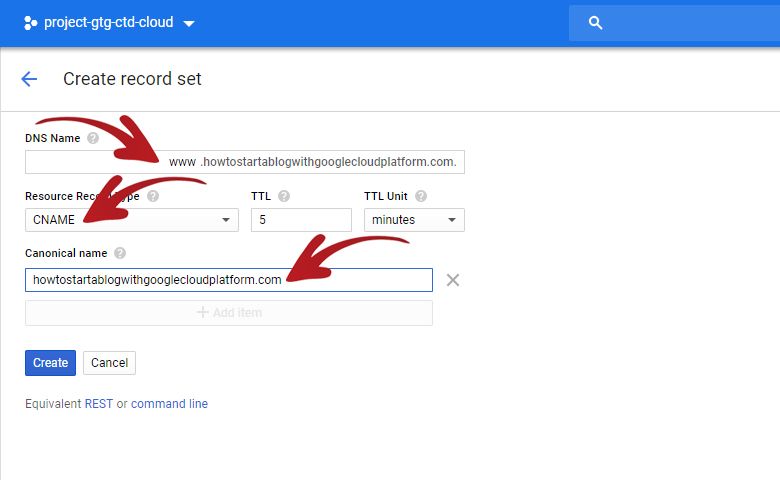
Change the Resource Record Type to CNAME.
In the Canonical Name field type your domain name without www.
See how I did it in the image above.
After you setup the DNS Name, Resource Record Type and Canonical Name. Click the Create button.
7. Changing the DNS In Your Domain Registrar
The next step is now to login in to your domain registrar and change the DNS to the Google Cloud Platform DNS addresses.
The DNS addresses are the ones shown below.
In my case the DNS addresses are:
- ns-cloud-d1.googledomains.com.
- ns-cloud-d2.googledomains.com.
- ns-cloud-d3.googledomains.com.
- ns-cloud-d4.googledomains.com.
These are the DNS addresses I need to add to my domain registrar.
The domain registrar I used is NameCheap so it appears something like this to me.
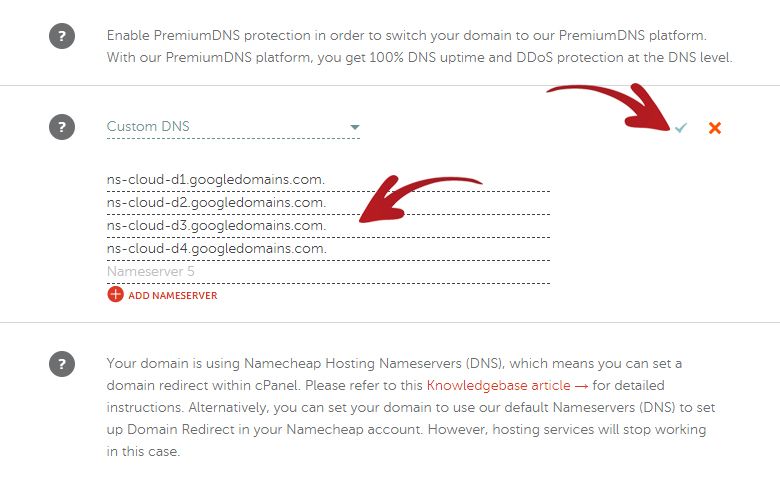
All I needed to do is choose the Custom DNS option and add the DNS addresses from the Google Cloud Platform.
After that I click the check icon and that is it for the domain registrar.
All I had to do is wait a few hours for the DNS to fully propagate.
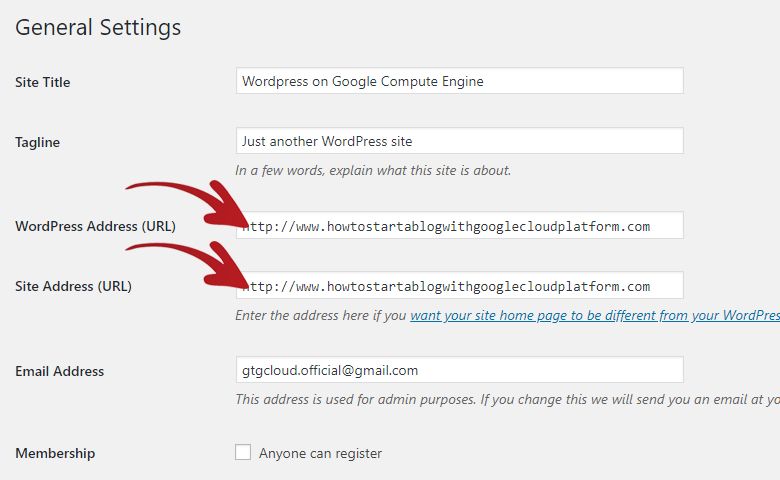
8. Update WordPress Site Addresses
The last step is to login to your WordPress admin page and go to Settings > General.
Then change the WordPress Address and Site Address to your domain name.
It was previously set to the Google Cloud Platform Site IP Address.
Conclusion
If you are interested in providing the best user experience for your visitors. Then hosting your blog with the Google Cloud Platform is a very good idea.
The website loads silky smooth with the Google Cloud Platform and without a doubt will provide a nice user experience.
The setup I made though will cost more than $20/month but currently Google Cloud Platform offers a $300 signup bonus which you can use for 12 months.
This means that you can literally host your website for free for 12 months.
After you setup your WordPress website and domain. You might want to consider using my recommended essentials plugins.